Thursday, May 5, 2011
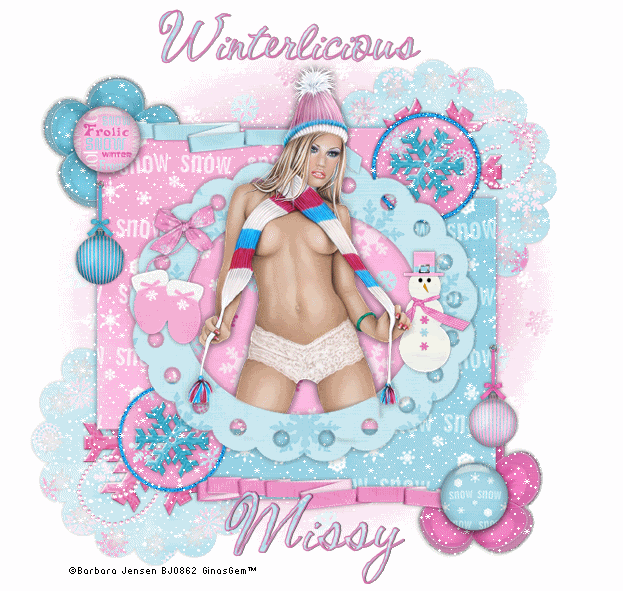
 Winterlicious
This tutorial was written by me on 8 November 2008. Any similarities to other tutorials is purely coincidental.
Supplies Neeed:
Tube of choice. I am using the awesomely sexy artwork of Barbara Jensen. If you wish to use her artwork you must purchase a license at her site here
Scrap kit Winterlicious by Missy of Misfits Scrapz. You can download this winterlicious freebie kit here Thank you Missy!
Template # 30 made by me, which you can download on my blog here
Mask by Becky. Unfortunately her site is now closed. :-(
Falling snow animation
Font of choice. I used CAC shishoni brush, which you can download here
Plugins
FM Tile Tools Blend Emboss
Animation Shop
Let's get started! Open up my template and duplicate (SHIFT+D). Close the original and delete the credits.
Highlight your white background. Open up a paper of choice. Copy and paste onto your canvas. Apply Becky's mask:
Source Lumincance
Fit to Canvas
Hide all mask.
Delete the mask on your layer palette. Answer yes to the pop up box. Merge the group. Resize the mask layer by 93%, smartsize. Apply FM Tile Tools Blend Emboss with the default settings.
Highlight the scallop circle 1. Go to selections > select all. Selections > float. Selections > defloat. Open up a paper of choice and resize by 79%, smartsize. Copy and paste as a new layer onto your canvas. Go to selections > invert. Hit delete on your keyboard. Deselect (CTRL+D) Give the layer a drop shadow of H and V 0, Opacity 45, Blur 5.00. Delete the gray circle scallop.
Highlight the scallop circle 2 layer and repeat the same steps that you did with the scallop 2 layer.
Open up a chrome snowflake of choice. Resize by 30%, smartsize. Copy and paste onto your canvas. Give it a drop shadow of H and V 0, Opacity 45, Blur 3.00. Duplicate the snowflake and postion to your liking on your scalloped circles.
Open up a bling doodle of choice. (preferable one that is a different color than the paper you used for your circle scallops) Resize by 30%, smartsize. Go to adjust > sharpen. Position the doodle to your liking over the snowflake. Duplicate the doodle. Go to image > mirror. Image > flip. Position the duplicated doodle on the other snowflake.
Open up the 2 different colored flowers. Resize them by 45%, smartsize. Copy and paste them onto your canvas. Give them a drop shadow of H and V 0, Opacity 50, Blur 5.00. Position them as in my tag above.
Highlight the rectangle 1 layer. Select, float and defloat. Open up a paper of choice. Resize by 79%, smartsize. Copy and paste onto your canvas. Selections > invert. Hit delete. Deselect. Give the layer a drop shadow of H and V 0, Opacity 55, Blur 10.00. Delete the black rectangle layer.
Highlight the rectangle 2 layer. Repeat the same steps as above but use a contrasting paper.
Open up 2 ribbons that are different colors. Resize them both by 45%, smartsize. Copy and paste them onto your canvas. Position one at the top of the left rectangle. Give it a dropshadow of H and V 0, Opacity 45, Blur 5.00. Position the other ribbon at the bottom of the right rectangle. Give it the same drop shadow as your other ribbon.
Open up 2 buttons of choice. Resize them both by 40%, smartsize. Copy and paste them as a new layer onto your canvas. Give them both a drop shadow of H and V 0, Opacity 45, Blur 4.00. Position them over the ends of the ribbons.
Open up the 2 baubles. Resize them by 30%, smartsize. Go to adust > sharpen (on both baubles) Paste both baubles onto your canvas. Give them both a drop shadow of H and V 0, Opacity 40, Blur 3.00. Position them to your liking.
Highlight the circle fill 1 layer. Select, float and defloat. Open up a paper of choice. Resize by 60%, smartsize. Copy and paste onto your canvas. Selections > invert. Hit delete. Deselect. Delete teh gray circle fill.
Highlight the circle frame 1 layer. Select, float and defloat. Add a new raster layer. Floodfill the new layer with a color of choice. Deselect. Go to add/remove noise > add noise. Random and monochrome checked, noise value 25. Give the layer a drop shadow of H and V 0, Opacity 50, Blur 5.00.
Repeat the same steps with the circle 2 fill and frame layer.
Open up the other chrome snowflake. Resize by 20%, smartsize. Copy and paste onto your canvas. Give it a drop shadow of H and V 0, Opacity 40, Blur 3.00. Duplicate the snowflake and position them inside of your circles.
Hide your oval scalloped fill layer and your oval scalloped frame layer. Merge your visible layers. Copy.
Open up animation shop. Paste as a new animation. Duplicate until you have a total of 10 frames. Select all frames (CTRL+A)
Open up the falling snow animation. Select all frames (CTRL+A). Copy. Highlight your tag animation. Go to Edit > paste into selected frames. Position your snow to your liking within your tag animation.
Back to PSP. Highlight your oval scalloped fill layer. Select, float and defloat. Open up a paper of choice. Resize by 79%, smartsize. Copy and paste onto your canvas. Selections > invert. Hit delete. Deselect. Delete the gray oval fill layer.
Highlight your oval scallop frame. Select, float and defloat. Open up a paper of choice. Resize, 79%, smartsize. Copy and paste onto your canvas. Selections > invert. Hit delete. Deselect. Delete the gray scalloped frame.
Open up your tube. Resize bicubic if necessary. Copy and paste onto your canvas. Give your tube a drop shadow of H and V 0, Opacity 55, Blur 12.00. Position your tube to your liking within the frame.
Grab your magic wand tool, tolerance set at 20.00, feather set at 0.00. Highlight your oval frame layer. Click inside the empty space. Go to selections > modify > expand by 2.00. Go to selections > invert.
Highlight your tube layer. Grab your eraser tool, size 20, opacity 85. Carefully erase the areas of the tube you don't want hanging over the frame. Deselect. Highlight your oval scallop frame and give it a drop shadow of H and V 0, Opacity 60, Blur 5.00.
Open up the mittens from the scrapkit. Resize by 35% smartsize. Copy and paste onto your canvas. Give them a drop shadow of H and V 0, Opacity 40, Blur 4.00. Position to your liking on the frame.
Open up a bow of choice. Resize by 25%, smartsize. Give it the same drop shadow that you gave your mittens. Position the bow on top of the mittens.
Open up the snowman. Resize by 25%, smartsize. Copy and paste onto your canvas. Give it the same drop shadow you gave your mittens. Position it to your liking on the frame.
Add your copyright info, watermark and text.
Hide your merged layer. (the one you pasted in AS). Merge your visible layers. Copy. Paste as a new animation in AS.
Duplicate until you have a total of 10 frames. Select all frames (CTRL+A) Copy. Highlight your snow animation. Go to Edit > paste into selected frame. Carefully position the tube and frame layer into your animation.
Crop and resize to your liking.
Optimize and save as gif.
I hope you enjoyed this tutorial. If you have any questions, just give me a shout!
Subscribe to:
Post Comments (Atom)
0 comments:
Post a Comment