Thursday, May 5, 2011
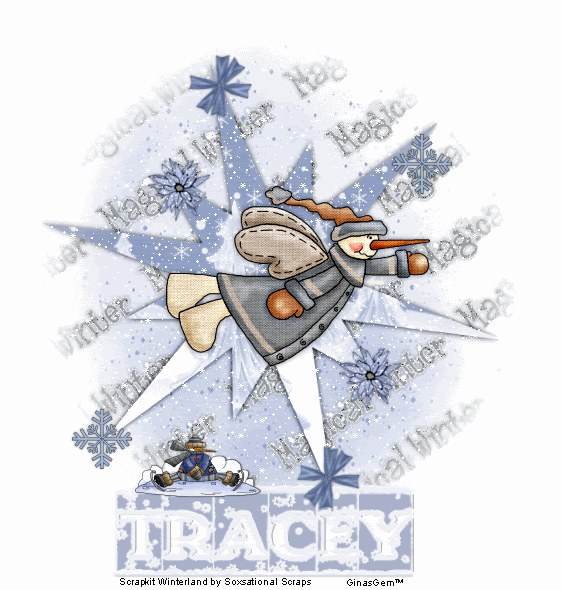
 Winter Magic
This tutorial was written by me on 24 October 2008. Any similarities to other tutorials is purely coincidental.
Supplies Needed:
Scrapkit Winterland by Soxsational Scraps. If you wish to purchase this awesome scrapkit you can here. Thank you, Tracey!!
Template made by me (included)
Winter Scene by Rainbow Coffi
Masky by Becky. Unfortunately, her site is closed. :-(
Falling Snow animation
Font of choice. I used Winternite, which you can download here
No outside plugins needed
Open up the template. Highlight your white background. Open up a paper of choice from the scrapkit. Paste as a new layer onto your canvas. Apply the Becky Mask, Source Luminance, Fit to Canvas, Hide all mask. Delete the mask on your layer palette. Answer yes to the pop up box, and merge the group.
Highlight the word art layer. Colorize to your liking. Go to Adust > Add/Remove Noise > Add Noise. Apply this effect, Random ticked, Noise value 15, Monochrome checked. Give it a drop shadow of H and V 0, Opacity 40,Blur 2.00.
Highlight the star layer. Go to selections > select all. Selections > Float. Defloat. Open up a paper of choice from the kit. Copy and paste as a new layer onto your canvas. Go to selections > invert. Hit delete on your keyboard. Do NOT deselect.
Open up the rainbow coffi trees. Add a new raster layer. Copy the rainbow coffi trees. On your working image, go to paste into selection. Deselect. Change the blend mode of the trees layer to overlay. Give both the paper star and trees a drop shadow of H and V 0, Opacity 60, Blur 10.00. Delete the gray star layer.
Merge your layers together. Copy. Open up animation shop. Paste as a new animation in AS. Duplicate until you have a total of 10 frames. Select all frames (CTRL+A) Open up the falling snow animation. Select all frames (CTR+A). Copy. Open up your tag animation. Go to Edit > Paste into selected frame.
Back to Paint Shop Pro. Open up WinterlandSman3. Resize by 70%, smartsize. Copy and paste onto your canvas. Position to your liking and give him a drop shadow of H and V 0, Opacity 60, Blur 6.00.
Open up a flower of choice. Resize by 20%, smartsize. Copy and paste onto your canvas. Give the flower a drop shadow of H and V 0, Opacity 40, Blur 4.00. Duplicate the flower. Position them to your liking.
Open up a ribbon staple of choice. Resize by 20%, smartsize. Copy and paste onto your canvas. Give it a drop shadow of H and V 0, Opacity 40, Blur 4.00. Duplicate the ribbon and position them to your liking.
Open up a snowflake of choice. Resize by 30%, smartsize. Copy and paste onto your canvas. Give it the same drop shadow you gave the ribbonstaple. Duplicate and position them to your liking.
Add any other embellishments of your choosing.
Add your watermark and text. Hide your merged layer, and merge your visible layers. Copy. Paste as a new animation in AS. Duplicate until you have a total of 10 frames. Select all frames (CTRL+A). Copy.
Open up your snow tag animation. Select all frames. Go to Edit > Paste into selected frame. Position carefully.
Optimize and save as gif.
I hope you enjoyed this tutorial. If you have any questions or comments, just give me a shout! :-)
Subscribe to:
Post Comments (Atom)
0 comments:
Post a Comment