Thursday, May 5, 2011
 Winter Blessings
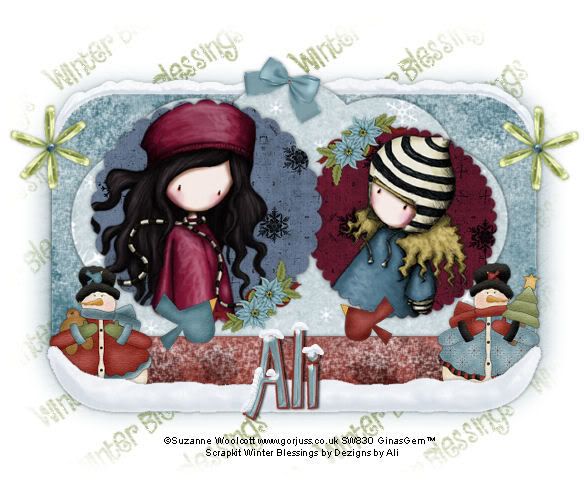
This tutorial was written by me on 23 October 2008. Any similarites to other tutorials is purely coincidental.
Supplies Needed:
2 tubes of choice. I am using the adorable artwork of Suzanne Woolcott. If you wish to use her artwork, you must purchase a license here
Scrapkit Winter Blessings by Dezigns by Ali. If you wish to purchase this wintery goods kit, you can here. Thank you, Ali!!
Template #9 made by me which you can download here
Winter Blessings Mask made by me, which can be downloaded here
Font of choice. I used Countryhouse which you can download here
No outside plug ins needed.
No other supplies needed
Let's get started! Open up the template and delete the credits. Highlight the Raster 1 Layer (rounded rectangle). Go to selections > select all. Selections > float. Defloat. Open up a paper of choice from the kit. (A darker colored paper is best if you are keeping the snow layers) Resize by 69%, smartsize. Copy and paste as new layer onto your canvas. Go to selections > invert. Hit delete on your keyboard. Deselect (CTRL+D) Give this layer a drop shadow of H and V 0, Opacity 65, Blur 8.00. Duplicate this layer. On the bottom layer, go to adjust > blur > gaussian blur. Apply with a radius of 13.00. Delete the gray rounded rectangle.
Highlight the curvy background layer. Select, float and defloat. Open up a paper of choice from the kit. Resize by 69%, smartsize. Copy and paste onto your canvas. Selections > invert. Hit delete on your keyboard. Deselect (CTRL+D) Give it a drop shadow - H and V 0, Opacity 65, Blur 8.00. Delete the gray curvey background layer.
Highlight the large scalloped circle layer. Selections, float and defloat. Open up another paper of choice. Resize by 45%, smartsize. Copy and paste as a new layer onto your canvas. Selections > invert. Hit delete on your keyboard. Do NOT deselect. Open up your first tube of choice. Resize bicubic, if necessary. Paste onto your canvas and position to your liking within the scalloped circle. Hit delete on your keyboard. Deselect. (CTRL+D). Give the scalloped circle a drop shadow of H and V 0, Opacity 65, Blur 8.00. Give your tube a drop shadow of H and V 0, Opacity 45, Blur 5.00. Delete the gray large scalloped circle.
Highlight the small scalloped circle layer. Repeat all the steps that you did with the large one, using a different tube.
Highlight the bottom pocket layer. Select, float and defloat. Open up a darker colored paper from the kit. Resize by 69%, smartsize. Copy and paste onto your canvas. Selections > invert. Hit delete on your keyboard. Deselect. Give it a drop shadow - H and V 0, Opacity 65, Blur 5.00. Delete the black bottom pocket layer.
Open up the snowmen from the kit. Resize by 30%, smartsize. Highlight the small scalloped circle layer. Paste the snowmen as new layers onto your canvas. Give them a drop shadow of H and V 0, Opacity 45, Blur 5.00. Position them to your liking.
Open up a christmas flower of choice. Resize by 20%, smartsize. Copy and paste onto your canvas. Go to Image > Free Rotate Left by 25.00, both boxes unchecked. Go to Adjust > Sharpness > Unsharp Mask. Apply with Radius 10.00, Strenght 25, Clipping 1. Give the flower a drop shadow - H and V 0, Opacity 45, Blur 5.00. Position the flowers on the large scalloped circle. Duplicate the christmas flowers. Go to Image > Mirror. Image > Flip. Position the duplicated flowers on the small scalloped circle.
Add any other embellishments of your choosing. :-)
Highlight your background. Choose a medium color from your tube or tag. Add a new a raster layer. Floodfill the new layer with this color.
Apply the Winter Blessings Mask with these settings:
Source Luminance
Fit to Layer
Hide all Mask
Delete the mask from your layer palette. Answer yes to the pop up box, and merge the group. Resize the mask layer 90%, smartsize.
Crop and resize to your liking. Add your copyright info, watermark and your text.
I hope you enjoyed this tutorial! If you have any questions, just give me a shout. :-D
Subscribe to:
Post Comments (Atom)
0 comments:
Post a Comment