Monday, May 2, 2011
 Vivid Rac

This tutorial was written by me on 26 April 2010. Any similairties to other tutorials is purely coinidental.
Supplies Needed:
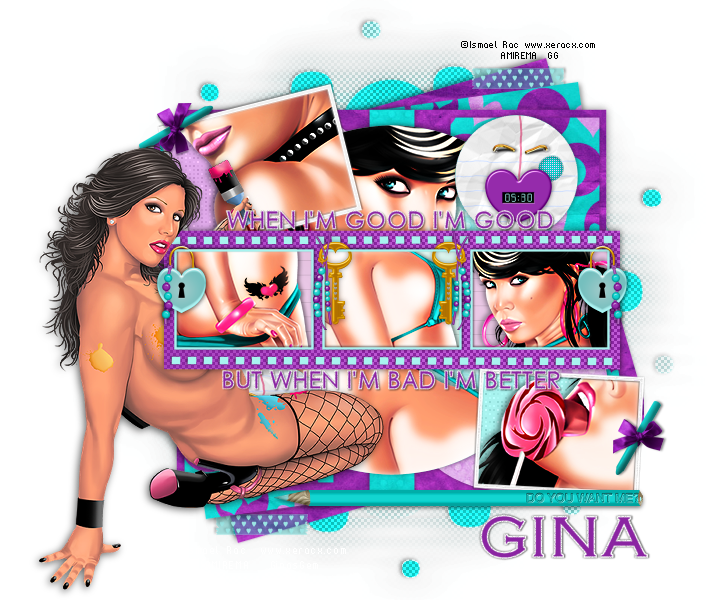
3 or 4 tubes of choice. I am using the fantabulous artwork of Ismale Rac. I bought this tube when he was still with AMI (now closed), but you can now find his tubes at his personal store here.
Scrap kit. I used Vivid Crush made by me. If you would like to purchase this kit, you can here, here, here, here or here. Also, grab the free add on from my scrap blog here.
Template 191 made by me. You can grab it here.
Vix Mask BGS0906. This mask is available as part of a goodie grab bag she offered back in Sept. 09. You can find the mask (and other great goodies) at her blog here. Thank you, Vix!
Font of choice. I used Copperplate Gothic Light. (pay font)
Plugins:
Xero Filters - Radiance (freeware)
Pentacom Filters - Color Dot (freeware)
Tronds Filters 1 - Chessy (freeware)
No other supplies are needed
*~*~*~*~*~*~*~*~*~*~*~*~*~*~*~*~*~*~*~*~*~*~*~*~*~*~*~*~*~*~*~*~*~*~*
Ok! Let's get started! Open up the template. Duplicate by holding down shift + d. Close the original. Delete the credit info layer.
Highlight the Square 1 layer. Go to selections > select all. Selections > float. Selections > defloat. Open up a paper from the kit. (I used paper 33). Resize the paper by 65%, smartsize. Copy and paste as a new layer onto your canvas. Go to selections > invert. Hit delete on your keyboard. Deselect (CTRL+D). Give the layer a drop shadow of H -2, V -2, Opacity 45, Blur 8.00. Delete the torquise Square 1 template layer.
Highlight the Square 2 layer. Select, float and defloat. Open up another paper from the kit. (I used paper 8). Resize by 60%, smartsize. Copy and paste as a new layer onto your canvas. Go to selections > invert. Hit delete on your keyboard and deselect. Give the layer a drop shadow of H 2, V 2, Opacity 45, Blur 8.00. Delete the purple Square 2 template layer.
Highlight the Square 3 layer. Select, float and defloat. Open up the same paper you used for the Square 1 layer. (I used paper 33) Resize by 65%, smartsize. Copy and paste as a new layer onto your canvas. Selections > invert. Hit delete and deselect. Give the layer a drop shadow of H and V 0, Opacity 45, Blur 10.00. Delete the black Square 3 template layer.
Highlight the Small Square 1 layer. Select, float and defloat. Open up the same paper you used for the Square 2 layer (I used paper 8). Resize by 60%, smartsize. Copy and paste as a new layer onto your canvas. Selections > invert. Hit delete and deselect. Give the layer a drop shadow of H 1, V -1, Opacity 40, Blur 6.00. Delete the gray Small Square 1 template layer.
Highlight the Small Square 2 layer. Select, float and defloat. Open up the same paper you just used. Resize, 60%, smartsize. Copy and paste as a new layer onto your canvas. Selections > invert. Hit delete on your keyboard. Deselect (CTRL+D). Give the layer a drop shadow of H -1, V 1, Opacity 40, Blur 6.00. Delete the gray Small Square 2 template layer.
Highlight the Medium Circle 1 layer. Select, float and defloat. Open up a paper from the kit. (I used paper 19). Resize by 65%, smartsize. Copy and paste as a new layer onto your canvas. Selections > invert. Hit delete and deselect. Give the layer a drop shadow of H -1, V 1, Opacity 45, Blur 6.00. Delete the light torquoise medium circle 1 template layer.
Highlight the Medium Circle 1 layer. Select, float and defloat. Open up the same paper you just used. Resize by 65%, smartsize. Copy and paste as a new layer onto your canvas. Selections > invert. Hit delete and deselect. Give the layer a drop shadow of H 1, V -1, Opacity 45, Blur 6.00. Delete the light torquoise medium circle 2 template layer.
Highlight the Thin Rectangle layer. Select, float and defloat. Open up a paper from the kit. (I used paper 21) Resize, 65%, smartsize. Copy and paste as a new layer onto your canvas. Selections > invert. Hit delete and deselect. Give the layer a drop shadow of H and V 0, Opacity 45, Blur 8.00. Delete the torquoise Thin Rectangle template layer.
Hilight the Large Circle layer. Select, float and defloat. Open up a paper from the kit. (I used paper 20). Resize by 65%, smartsize. Copy and paste as a new layer onto your canvas. Selections > invert. Hit delete. Don't deselect yet!
Open up your first tube or close up of choice. Resize, if necessary, bicubic. Copy and paste as a new layer onto your canvas. Position your tube or close up to your liking within the selection. Hit delete. Deselect.
Apply Xero Radiance to your tube/close up with the following settings:
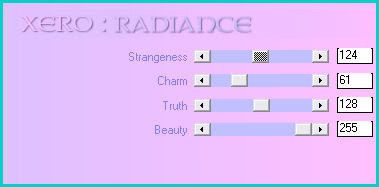
Now go to Adjust > Sharpness > Unsharp Mask. Apply with a Radius of 5, Strength 20, Clipping 1. Give the tube a drop shadow of H 2, V 0, Opacity 40, Blur 6.00.
Highlight the paper large circle and give it a drop shadow of H and V 0, Opacity 45, Blur 9.00. Delete the purple Large Circle template layer.
Highlight the Small Circle 1 layer. Select, float and defloat. If you would like the circle to be a different color, then add a new raster layer and floodfill the new layer with your color of choice. Now open up the Crumpled Notebook Paper (from the elements folder). Position the notebook paper to your liking within the selection. (I positioned it so one of the binder holes were showing) Go to selections > invert. Hit delete on your keyboard and deselect. Give the notebook paper layer a drop shadow of H and V 0, Oapcity 40, Blur 6.00.
Highlight your colored small circle 1 layer. Apply Pentacom Filters - Color Dot with the following settings:
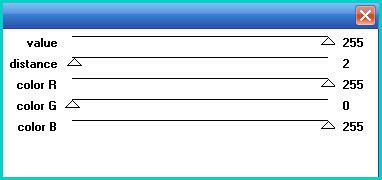
You can play around with the Color R, G and B sliders to get the color you desire for your dots.
Highlight the Small Circle 2 layer. Select, float and defloat. Again, if you want the circles a different color, add a new raster layer and floodfill the layer with your color of choice. Open up the Crumpled Notebook paper again. Copy and paste as a new layer onto your canvas. Positon to your liking within the selection. Go to selections > invert. Hit delete and deselect. Give the layer a drop shadow of H and V 0, Opacity 40, Blur 6.00. Highlight the colored small circle 2 layer and apply Color Dot, same settings you just used.
Highlight the Frame Fill 1 layer. Select, float and defloat. Open up your 2nd tube of close up of choice. Resize, if necessary, bicubic. Copy and paste as a new layer onto your canvas. Position to your liking within the selection. Selections > invert. Hit delete on your keyboard and deselect. Apply Xero Radiance with the following settings:
Now go to Adjust > Sharpness > Unsharp Mask. Apply with a Radius of 5, Strength 20, Clipping 1. Give the tube a drop shadow of H -2, V 0, Opacity 40, Blur 6.00.
Highlight the rectangle layer. Select, float and defloat. Add a new raster layer to your working image. Change your background color to #8b25a2 (or another color if you prefer). Don't deselect yet! Add another new raster layer to your working image. Apply Tronds Filter - Chessy with the following settings:
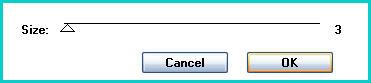
Deselect. Change the blend mode of the Chessy layer to Luminance (Legacy) Lower the opacity to about 30.
Highlight your floodfill rectangle layer. Give it a drop shadow of H and V 0, Opacity 45, Blur 10.00. Delete the light purple Rectangle template layer.
Highlight the Dotted Line 1 layer. Give it a drop shadow of H 1, V 0, Opacity 40, Blur 2.00. Highlight the Dotted Line 2 layer. Give it a drop shadow of H -1, V 0, Opacity 40, Blur 2.00.
Highlight the Rectangle Frame 1 layer. Grab your magic wand tool, Feather set to 0, Tolerance to 0. Click inside the empty space of the Rectangle Frame 1 so that there are marching ants all around the inside of it. Go to selections > modify > expand by 2.00. Open up a notebook from the kit. (I used Note book 4) Resize it by 45%, smartsize. Copy and paste as a new layer onto your canvas. Move the lined paper within the selection. Go to selections > invert. Hit delete on your keyboard. Don't deselect yet!
Open up your 3rd tube of choice. Resize as necessary, bicubic. Copy and paste as a new layer onto your canvas. Position it to your liking within the selection. Hit delete on your keyboard. Apply Xero Radiance to the tube, same settings as before. Apply unsharp mask, same settings as before. Give it a drop shadow of H 2, V 0, Opacity 40, Blur 5.00. Highlight the Rectangle Frame 1 layer and give it a drop shadow of H and V -1, Opacity 45, Blur 4.00.
Highlight the Rectangle Frame 2 layer. Grab your magic wand tool again, same settings as before. Click inside the empty space of the frame so that there are marching ants all around it. Go to selections > modify > expand by 2.00. Open up another Notebook from the kit. (I used Notebook 3) Resize by 45%, smartsize. Copy and paste as a new layer onto your canvas. Position so that the lined paper is within the selection. Selections > invert. Hit delete. Don't deselect. Open up the same tube you just used. Resize if necessary, bicubic. Copy and paste as a new layer onto your canvas. Positon to your liking within the selection. Hit delete. Deselect. Apply Xero radiance, same settings. Apply Unsharp Mask, same settings. Give the tube a drop shadow of H and V 0, Opacity 40, Blur 5.00. Highlight the Rectangle Frame 2 layer and give it a drop shadow of H 0, V 1, Opacity 40, Blur 4.00.
Highlight the Rectangle Frame 3 layer. Grab your magic wand tool again, same settings. Click inside the empty space of the frame so that there are marching ants all around it. Open up the Notebook you used for the Rectangle Frame 1 layer. Resize by 45%, smartsize. Copy and paste as a new layer onto your canvas. Position so that the lined paper is within the selection. Selections > invert. Hit delete. Don't deselect.
Open up your tube. Resize as necessary, bicubic. Copy and paste your tube as a new layer onto your canvas. Position to your liking within the selection. Hit delete and deselect. Apply Xero Radiance, same settings as before. Apply Unsharp Mask, same settings. Give it a drop shadow H -2, V 0, Opacity 40, Blur 5.00. Give the Rectangle Frame 3 layer a drop shadow of H and V 1, Opacity 45, Blur 4.00.
Highlight the Frame 2 Fill layer. Select, float and defloat. Open up a tube or close up. Resize, if necessary, bicubic. Copy and paste as a new layer onto your canvas. Position to your liking within the selection. Selections > invert. Hit delete and deselect. Apply Xero Radiance (same settings) to your tube. Apply Unsharp Mask, same settings. Give your tube a drop shadow of H -2, V 0, Opacity 40, Blur 6.00.
Open up a tape from the kit. Resize by 20%, smartsize. Copy and paste as a new layer onto your canvas. Give it a drop shadow of H 2, V 0, Opacity 35, Blur 4.00. Position it at the right upper corner of the bottom square. Drag it so it is right on top of your bottom square layer. Duplicate the tape. Go to image > mirror. Position the duplicated tape at the bottom left corner of the bottom square.
Highlight your top layer. Open up a staple from the kit. Resize by 25%, smartsize. Copy and paste as a new layer onto your canvas. Give it a drop shadow of H 1, V 0, Opacity 40, Blur 3.00. Position the staple to your liking on the top notebook paper circle. Duplicate the staple. Mirror it. Position it to your liking on the bottom notebook paper circle layer. Drag both staple layers to right above your notebook paper circles.
Open up a digital clock from the kit. Resize by 20%, smartsize. Copy and paste as a new layer onto your canvas. Give it a drop shadow of H 2, V 0, Opacity 35, Blur 4.00. Position it below the staple on on of your notebook papers. Duplicate. Position it underneath the other staple on your notebook paper circle. Drag both clock layers beneath your rectangle layer.
Open up a crayon of choice from the kit. Resize by 25%, smartsize. Copy and paste as a new layer onto your canvas. Give it a drop shadow of H -2, V 1, Opacity 40, Blur 4.00. Position to your liking on the bottom white frame. Duplicate your crayon. Go to image > free rotate. Rotate left by 90.00 degrees, both boxes unchecked. Go to image > flip. Position the duplicated crayon to your liking on the top white frame.
Highlight your top layer. Open up a heart lock from the kit. Resize by 15%, smartsize. Copy and paste as a new layer onto your canvas. Position it at the right upper corner of the right rectangle frame. Duplicate. Drag the duplicated heart lock below your Rectangle Frame 3 layer, right above your tube layer. Give it a drop shadow of H 2, V 0, Opacity 35, Blur 5.00. Highlight your top heart lock layer. Grab your eraser tool, size 5, Opacity 90. Zoom in real close to the heart lock. Carefully erase one side of the gold lock loop so it looks as if it is intertwined with the frame. Duplicate the top heart lock layer. Go to image > mirror. Highlight the bottom heart lock layer. Duplicate. Go to image > mirror.
Highlight your top layer. Open up a key from the kit. Resize by 25%, smartsize. Copy and paste as a new layer onto your canvas. Position it at the left upper corner of the middle rectangle frame. Duplicate the key. Drag the duplicated layer below your rectangle 2 layer. Give it a drop shadow of H 2, V 0, Opacity 35, Blur 5.00. Highlight the top key. Grab your eraser tool, same settings. Carefully erase one side of the loop on the key so it looks as if it is intertwined with the frame. Duplicate. Go to image > mirror. Highlight the bottom key and duplicate. Go to image > mirror.
Highlight your top layer. Open up a pencil from the kit. Resize by 70%, bicubic. Copy and paste as a new layer onto your canvas. Give it a drop shadow of H 0, V 2, Opacity 40, Blur 4.00. Position as in my tag above.
Add any other embellishments of your choosing.
Highlight your white background layer. Open up a paper from the kit. (I used paper 32) Resize by 95%, smartsize. Copy and paste as a new layer onto your canvas. Apply Vix maskGBS0906 with the following settings:
Source Luminance
Fit to LAYER
Hide all Mask
Delete the mask from your layer palette, answer yes to the pop up box and merge the group. Center the mask behind your tag. Still on your mask layer, select, float and defloat. Add a new raster layer to your working image. Apply Tronds Filters - Chessy with the following settings:
Deselect. Give the layer a drop shadow of H 0, V 2, Opacity 30, Blur 4.00. Change the blend mode to Overlay.
Highlight the paper mask layer. Give it a drop shadow of H -2, V 0, Opacity 50, Blur 4.00.
Highlight your top layer. Open up your main tube. Resize, as necessary, bicubic. Copy and paste as a new layer onto your canvas. Position your tube to your liking. Duplicate your tube. Drag the bottom tube layer to below your purple rectangle layer. Give it a drop shadow of H -2, V 2, Opacity 50, Blur 12.00. Highlight your top tube layer. Grab your eraser tool, size 35, opacity 100. Carefully erase certain parts of your tube so it looks as if the bottom half of her body is behind the rectangle. (see my tag for reference)
Crop and resize to your liking. Add your copyright info, watermark and your text.
Save as JPG or PNG.
I hope you enjoyed this tutorial! If you have any questions, just give me a shout.
Subscribe to:
Post Comments (Atom)
0 comments:
Post a Comment