Monday, May 2, 2011
 Cheeky Diva
This tutorial was written by me on 23 April 2010. Any similarities to other tutorials is purely coincidental.
Supplies Needed:
3 or 4 tubes of choice. I am using the awesome artwork of Ismael Rac. If you would like to use his artwork, you must purchase the appropriate license at AMI.
Scrap kit. I used Cheeky Diva made by me. If you would like to purchase it, you can here, here, here, here or here. Also, grab the free add on from my scrap blog here. :-)
Template 190 made by me. You can find it here.
WSL Mask 57 by wee scots lass creations. You can download it from her blog here. Thank you, Chelle!
Blinking Arrows animation made by me.
Cheeky Diva word art animation made by me.
Font of choice. I used Large 9 which you can download here.
Plugins:
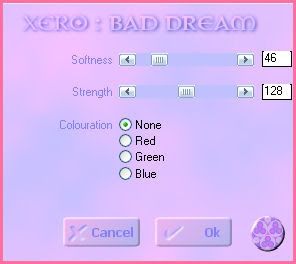
Xero Filters - Bad Dream (freeware)
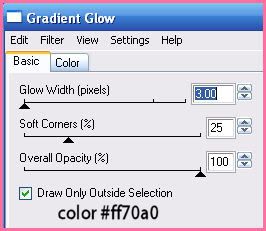
Eyecandy 4000 - Gradient Glow (PTU)
Jasc Animation Shop (opt)
Supplies HERE
Ok! Let's get started! Open up my template. Press shift + d to duplicate. Close the original. Delete the credit layer. Highlight the top rectangle layer. Go to selections > select all. Selections > float. Selections > defloat. Open up a paper from the kit. (I used paper 4) Resize by 70%, smartsize. Copy and paste as a new layer onto your canvas. Go to selections > invert. Hit delete on your keyboard. Don't deselect yet.
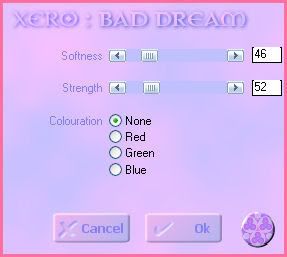
Open up your first tube of choice. Resize if necessary (bicubic). Copy and paste as a new layer onto your canvas. Move it towards one side of the rectangle. Position to your liking. Duplicate the tube. Hide the top tube and drag it to the top of your layer palette. (we'll come to it in a moment.) Highlight your bottom unhidden tube. Hit delete on your keyboard. Deselect(CTRL+D). Apply Xero Filters - Bad Dream with the following settings:
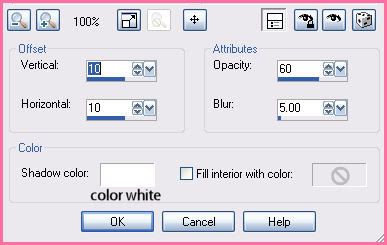
Go to adjust > sharpness > unsharp mask. Apply with radius 5, strenght 25, clipping 2. Give the tube a drop shadow of H and V 0, Opacity 60, Blur 5.00. Change the blend mode of the tube to Luminance (Legacy) and lower the opacity to about 50. Duplicate. Go to image > mirror. Go to image > mirror. It should be correctly positioned on the opposite side of the rectangle.
Highlight the paper top rectangle. Apply Xero Bad Dream (same settings). Apply unsharp mask, same settings as before. Give it a drop shadow of H and V 0, Opacity 65, Blur 10.00. Delete the black top rectangle template layer.
Highlight the top shape layer. Select, float and defloat. Open up a paper from the kit. (I used paper 5). Resize by 70%, smartsize. Copy and paste as a new layer onto your canvas. Selections > invert. Hit delete on your keyboard. Do not deselect yet!
Highlight your hidden tube. Hit delete. Deselect. Apply Xero Bad Dream, same settings as before. Apply unsharp mask, same settings as before. Change the blend mode to Luminance (Legacy). Give it a drop shadow of H and V 0, Opacity 50, Blur 6.00. Duplicate. Go to image > mirror. It should be positioned perfectly at the other side of the rectangle. (see my tag for reference) Delete the gray top shape template layer.
Highlight your top rectangle paper layer. Apply Xero Bad Dream, same settings as before. Apply Unsharp Mask, same settings as before. Now, apply Eyecandy Gradient Glow with the following settings:
Give it a drop shadow of H and V 0, Opacity 60, Blur 5.00. Still on your paper top shape, select, float and defloat. Add a new raster layer to your working image. Making certain you are on your new layer, go to effects > 3D effects > cut out. Apply with the following settings:
Now apply cut out with the following settings:
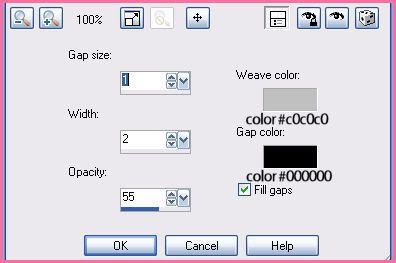
Deselect. Still on the cut out layer, go to effects > texture effects > weave. Apply with the following settings:
Delete the gray top shape template layer.
Highlight the bottom rectangle layer. Select, float and defloat. Open up the same paper you used for the top rectangle. (I used paper 4). Resize by 70%, smartsize. Copy and paste as a new layer onto your canvas. Selections > invert. Hit delete on your keyboard. Don't deselect yet!
Open up your second tube of choice. Resize if necessary (bicubic). Copy and paste as a new layer onto your canvas. Move it towards one side of the rectangle. Position to your liking within the selection. Duplicate it. Hide your top tube layer, and drag it above the bottom shape layer on you layer palette. Highlight your bottom, unhidden tube. Hit delete on your keyboard. Deselect (CTRL+D). Apply Xero Bad Dream to your tube (same settings as before) Now apply Unsharp Mask to your tube (same settings as before). Give it a drop shadow of H and V 0, Opacity 60, Blur 8.00. Change the blend mode to Luminance (Legacy) and lower the opacity to about 50. Duplicate it. Go to image > mirror. It should be correctly positioned on the opposite side of the rectangle.
Highlight the paper bottom rectangle layer. Apply Bad Dream (same settings) Now, apply unsharp mask, same settings as before. Give it a drop shadow of H and V 0, Opacity 65, Blur 10.00.
Highlight your bottom shape layer. Select, float and defloat. Open up the same paper you used for the top shape layer (I used paper 5). Resize by 70%, smartsize. Copy and paste as a new layer onto your canvas. Selections > invert. Hit delete. Don't deselect yet.
Unhide your hidden tube layer. Hit delete on your keyboard. Deselect. Apply Bad Dream, same settings as before. Apply Unsharp Mask, same settings as before. Change the blend of the tube to Luminance (Legacy). Give it a drop shadow of H and V 0, Opacity 50, Blur 6.00. Duplicate. Go to image > mirror. It should be positioned perfectly at the other side of the rectangle. (see my tag for reference) Highlight the paper bottom shape layer. Apply Bad Dream, same settings as eariler. Apply Unsharp Mask, same settings as earlier. Now apply Eyecandy 400, same settings as before. Give it a drop shadow of H and V 0, Opacity 60, Blur 5.00. Delete the gray bottom shape template layer.
Highlight your top shape cut out layer. Duplicate it. Go to image > flip. The duplicated cut out layer should be over the paper bottom shape layer.
Highlight your middle rectangle layer. Select, float and defloat. Open up the paper you used for the shape layers. (I used paper 5). Resize by 70%, smartsize. Copy and paste as a new layer onto your canvas. Go to selections > invert. Hit delete on your keyboard. Deselect. Apply Bad Dream, same settings you've used. Apply Unsharp Mask, same settings. Give the layer a drop shadow of H and V 0, Opacity 65, Blur 10.00. Delete the black middle rectangle template layer.
Highlight your paper middle rectangle layer. Select, float and defloat. Add a new raster layer to your working image. On your new raster layer, go to effects > 3D effects > cut out. Apply with the following settings:
Apply again with the following settings:
Deselect. Go to effects > texture effects > weave. Apply with the following settings:
Lower the opacity of the cut out weave layer to about 55. Duplicate. Go to image > flip.
Highlight the arrow crosses layer. Select, float and defloat. Open up the same paper you used for the top and bottom rectangle layers. (I used paper 4). Resize by 70%, smartsize. Copy and paste as a new layer onto your canvas. Go to selections > invert. Hit delete on your keyboard. Deselect. Give the layer a drop shadow of H and V 0, opacity 60, Blur 8.00.
Highlight the gray arrow crosses layer. Grab your magic wand tool, Mode - Add, Match Mode - RGB Value, Tolerance set to 100, Feather set to 0.00, Anti-alias and contiguos ticked. Click on the left gray arrow cross. You should have marching ants all around it. Now go to selections > modify > smooth. Apply with the following settings:
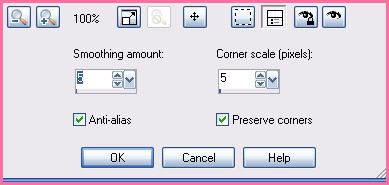
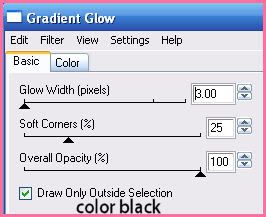
We smooth the selection so that we don't get ragged edges on our shape. :o) Okay, highlight the paper arrow crosses layer. Open up a tube. Resize as necessary, bicubic. Copy and paste as a new layer onto your canvas. Position to your liking within the selection. Go to selections > invert. Hit delete on your keyboard. Deselect (CTRL +D) Apply Xero Bad Dream, same setting as before. Apply unsharp mask, same settings. Now apply Eyecandy - Gradient Glow with the following settings:
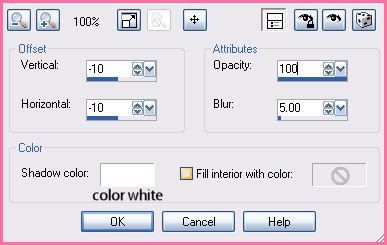
Change the blend mode of the tube to Luminance (Legacy). Give the tube a drop shadow of H and V 0, Opacity 75, Blur 10.00, Color - WHITE. Lower the opacity of the tube to about 60.
Highlight the gray arrow crosses layer again. Grab your magic wand tool, same settings as before. Click in the middle of the middle arrow crossso that you have marching ants all around it. Go to selections > modify > smooth. Apply with the same settings. Open up another tube. Resize as necessary, bicubic. Highlight the paper arrows layer. Copy and paste the tube as anew layer onto your canvas. Selections > invert. Hit delete on your keyboard and deselect. Apply Xero Bad Dream (same settings) Apply Unsharp Mask, same settings. Apply Gradient Glow same settings you just used. Change the blend mode to Luminance (legacy) and lower the opacity to about 60. Give it a drop shadow H and V 0, oapcity 75, Blur 10.00, Color - white.
Highlight the gray arrow crosses layer again (last time I promise lol). Grab your magic wand tool, same settings. Click in the middle of the right arrow cross so that you have marching ants all around it. Smooth the selection. Highlight the paper arrow crosses layer. Open up another tube and resize as necessary. Copy and paste as a new layer onto your canvas. Position to your liking with the selection. Selections > invert. Hit delete and deselect. Apply Bad Dream and unsharp mask (same settings as before) Apply Gradient Glow, with the above steps, color black. Give the tube a drop shadow of H and V 0, Opacity 75, Blur 10.00, Color white. Change the blend mode to Luminance (Legacy) and lower the opacity to about 60. Delete the gray arrow crosses template layer.
Highlight the paper arrow crosses layer. Select, float and defloat. Add a new raster layer to your working image. Go to effects > 3D Effects > Cut Out. Apply with the following settings:
Apply again with the following settings:
Deselect. Go to effects > texture effects > weave. Apply with the following settings:
Drag the layer above all of your arrow crosses tube layers. Lower the opacity to about 65.
Open up a star brad from the kit. Resize by 17%, smartsize. Copy and paste as a new layer onto your canvas. Apply Bad Dream, same settings. Give it a drop shadow of H 2, V 1, Opacity 50, Blur 4.00. Arrange it between the left and middle arrow crosses. Duplicate. Go to image > mirror.
Open up another star brad from the kit. Resize by 12%, smartsize. Copy and paste as a new layer onto your canvas. Apply Bad Dream. Give it a drop shadow of H -1, V -1, Opacity 45, Blur 3.00. Position it on top of the left bigger star brad. Duplicate. Go to image > mirror.
Open up a string from the kit. Resize by about 20%, smartsize. Copy and paste as a new layer onto your canvas. Give ita drop shadow of H and V -1, Opacity 55, Blur 3.00. Position to your liking on the top rectangle shape. Duplicate. Go to image > mirror. Position the duplicated string to your liking on the bottop rectangle shape.
Hilight your white background layer. Open up a stars from the kit. Resize by 70%, smartsize. Copy and paste as a new layer onto your canvas. Apply Xero Bad Dream, same settings as before. Center it behind your tag. Give the layer a drop shadow of H 2, V -1, Opacity 60, Blur 4.00.
Highlight your white background layer again. Open up a paper from the kit. Don't resize!! (I used paper 24) Copy and paste as a new layer onto your canvas. Apply WSL Mask 57 with the following settings:
Source Luminance
Fit to LAYER
Hide all mask
Delete the mask layer from your layer palette, answer yes to the pop up box, and merge your group. Resize the mask by 95%, smartsize. Give it a drop shadow of H -2, V 0, Opacity 65, Blur 3.00.
If you are NOT animating, highlight the arrows layer. Select, float and defloat. Open up a paper from the kit. Copy and paste as a new layer onto your canvas. Go to selections > invert. Hit delete on your keyboard and deselect. Give the layer a drop shadow of H and V 1, Opacity 60, Blur 2.00. Skip down to after Animation Shop.
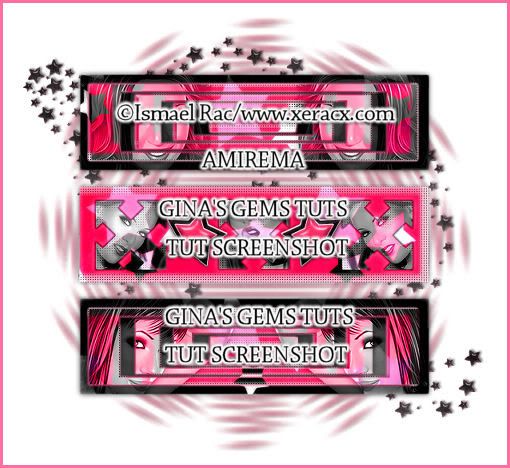
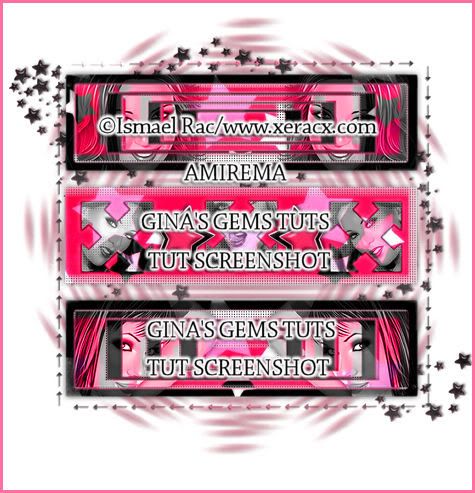
If you ARE animating, delete the template arrows layer. Merge all of your layers together. (even the white background layer) This is what you should have or something similar:
Open up Animation Shop. Copy your tag. Paste as a new animation in Animation Shop. Duplicate until you have a total 24 frames. Select all frames (CTRL+A). Open up the GG_Blinking Arrows mng file from the supplies. Select all of the frames (CTRL+A). Copy. Highlight your tag animation. Go to edit > paste into selected frame. Position the arrows like this:
Let's go back to Paint Shop Pro to finish our tag.
Open up a decorative safety pin. Resize by 25%, smartsize. Copy and paste as a new layer onto your canvas. Apply Bad Dream. Give it a drop shadow of H -2, V 1, Opacity 55, Blur 5.00. Position at the left upper corner of the top rectangle. Duplicate. Go to image > mirror. Then, image > flip.
Open up an eyelet ribbon of choice. Resize by 20%, smartsize. Copy and paste as a new layer onto your canvas. Apply Bad Dream. Go to image > free rotate. Rotate right by 45.00 degrees both boxes unchecked. Give ita drop shadow of H 2, V -1, Opacity 55, Blur 5.00. Position in the right upper corner of the top rectangle. Duplicate. Go to image > mirror. Then, image > flip.
Add any other embellishments if you choose.
Open up your main tube. Resize as necessary, bicubic. Copy and paste as a new layer onto your canvas. Apply Bad Dream witht he following settings:
Go to adjust > sharpness > unsharp mask. Apply with radius 5, strength 25, clipping 2. Give the tube a drop shadow of H and V 0, Opacity 65, Blur 12.00. Position it to your liking.
Add your copyright info, watermark and your text. If you are NOT animating, save as JPG or PNG.
If you are animating, hide your merged layer. Merge your main tube, the safety pin and eyelet ribbon layers together. This is what you should have (or something similar)

Copy. Go back to Animation Shop. Paste it as a new animation in Animation Shop. Copy. Hit the proprogate paste button:

Highlight the main tag (white background, rectangles, arrows, etc.) Select all frames (CTRL+A). Go to edit > paste into selected frame. Position is so that the safety pins and eyelet ribbons match up on the corners.
Open up the GG_Cheeky Diva_Word Animation mng file. Select all frames (CTRL+A). Make sure the proagate paste button is still ticked!! Highlight your tag. Select all frames (CTRL+A). Go to edit > paste into selected frame. Position the word art to your liking.
Resize your animation (bicubic resample) to your liking. Crop. Optimize and save as gif.
I hope you enjoyed this tutorial! If you have any questions, just give me a shout or send me an email.
Subscribe to:
Post Comments (Atom)
0 comments:
Post a Comment