Wednesday, May 4, 2011
 Vintage Dreams
This tutorial was written by me on 9 September 2008. Any similarities to other tutorials is purely coincidental.
*Note* Writing animation is not included in tutorial
Supplies Needed:
Tube of Choice. I am using the fabulous artwork of Jessica Dougherty. I got this tube when CILM was still open. You can find her at CDO now.
Vintage Scrapkit by Baby Cake Scraps. You can purchase this beautiful kit from Creative Scraps or her blog. She also has great freebies!!
Mask and Word Art made by me
Font of choice. I used Miss Stanfort which I can't provide because it is a pay font.
Filters needed:
Let's begin! Open up a new transparent image 700 x 700. Floodfill with white. Open up the round frame from the scrapkit. Resize by 45%, smartsize. Paste as a new layer onto your canvas. Grab your magic wand tool, tolerance 50, feather 0.00. Select inside the empty part of the frame. Go to selctions > modify > expand by 4.00. Open up a paper of choice and paste as a new layer onto your canvas. Go to Selections > Invert. Hit delete on your keyboard. Deselect (Ctrl +D) Drag your paper layer beneath your frame. Highlight your paper laye,r and apply Xero Tekstya with the following settings (make sure both boxes are unchecked!)

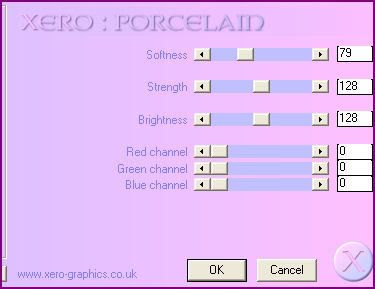
Still on the paper, apply Xero Porcelain with these settings:
Open your tube. Resize if necessary. Paste as a new layer onto your canvas. Center your tube in the middle of the frame. Give your tube a drop shadow of H 1 V -1, opacity 75%, Blur 10.00 Highlight your frame layer, and grab your magic wand tool, tolerance 50, feather 0.00. Click inside the empty part of the frame. Highlight your tube layer. Go to Selections > Invert. Grab your eraser tool and erase the bits of the tube that you don't want showing. Deselect (CTRL + D) Apply the filter Xero Porcelain to your tube layer same settings as before, except change the strength to 100. Go to Adjust > Sharpness > Unsharp Mask (Radius 5.00, Strength 10, Clipping 1)
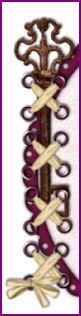
Highlight your frame layer and give it a drop shadow of H and V 0, opacity 68%, blur 5.00. Open up an eyelet ribbon of choice. Resize by about 30%, smartsize. Place on the left hand side of your frame. Give the eyelet a drop shadow of H 1, V -1, opacity 60, Blur 3.00.
Open up the key from your scrapkit. Resize by about 30%. Paste onto your canvas and drag it underneath the eyelet ribbons. Give it the same drop shadow you gave the ribbon:
Open up a swag of choice. Resize it by 20%. Paste as a new layer onto your canvas. Go to Mura Meister > Copies. Apply with the following settings:
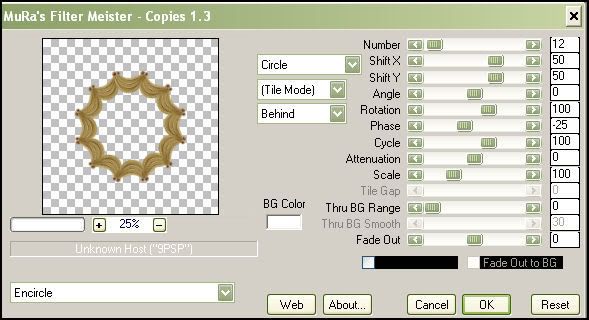
Drag the swag layer beneath your paper. Position so your frame is centered in the middle of it. Give it a drop shadow of H and V 0, Opacity 60%, blur 7.00. Hide your white background and merge your visible layers.
Open up a doodle of choice. Resize to your liking, paste onto your canvas and position to your liking behind your frame. Give it a drop shadow of H 1, V 0, Opacity 50%, Blur 3.00.
Open up 2 different colors of folded lace. Resize each one by 15%, and paste onto your cavas. Place on your frame to your liking. Give them the same drop shadow you gave your doodles. Open up a flower of choice. Resize it by 30%. Paste onto your canvas and duplicate the flower. On the duplicated flower, go to Image > free rotate > rotate left by 45.00 degrees. Place one flower on top of the other:
Open up a tag of choice. Place the string beneath your flowers. Give it a drop shadow of H and V 0, Opacity 60, Blur 5.00. Hide your white background and merge your visible layers.
Highlight your white background. Go to Layers > New Raster Layer. Floodfill the new layer with a medium dark color from your tube. Apply the mask to this layer. Delete the mask, answer yes, and merge the group.
Open up the wordart and resize by about 60%. Position on your tag to your liking. Crop and resize your tag if you like. Add your copyright info, your watermark and your text.
I hope you enjoyed this tutorial. If you have any questions, just email me. :-)
Subscribe to:
Post Comments (Atom)
0 comments:
Post a Comment