Monday, May 2, 2011
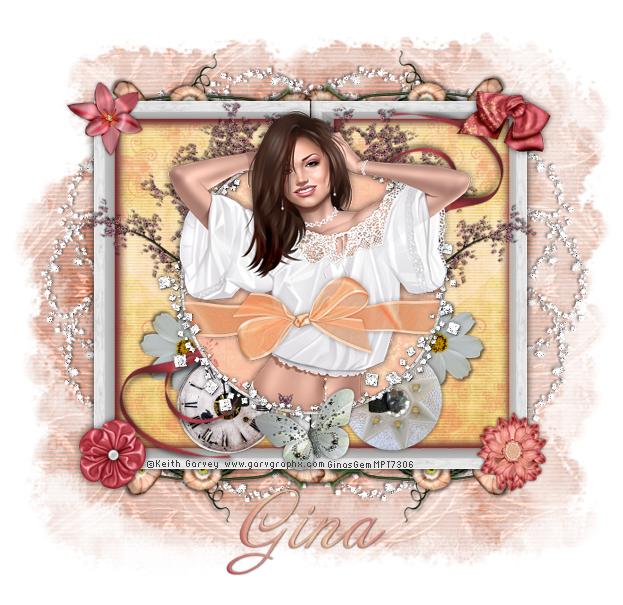
 Sweet Beauty
This tutorial was written by me on 14 September 2009. Any similarities to other tutorials is purely coincidental.
Supplies needed:
Tube of choice. I am using the awesome artwork of Keith Garvey. If you would like to use his artwork, you must purchase the appropriate license at MPT.
Scrapkit. I used A Touch of White made by me. It can be purchased at any of my stores. See my blog here, for details. :)
Mask 22 by Becky. Unfortunately, her site is now closed. :(
Font of choice. I used Annabelle JF. This is a pay font so I can't supply.
Plugins:
Supplies HERE
Ok! Let's get started! Open up a new transparent image 700 x 700. Floodfill with white. Open up the Wooden Box from the kit. Resize by 45%, smartsize. Copy and paste as a new layer onto your canvas. Go to image > free rotate. Rotate left by 90.00 degrees, both boxes unchecked. Give the wooden box a drop shadow of H and V 0, Opacity 80, Blur 12.00. Duplicate. Mirror the duplicate, and set them side by side so that the sides are touching.
Choose a bright color and make it your background color. (I used color # 68262c) Make your foreground null. Grab your rectangle tool and draw out a rectangle that fits inside one of the wooden boxes like this:
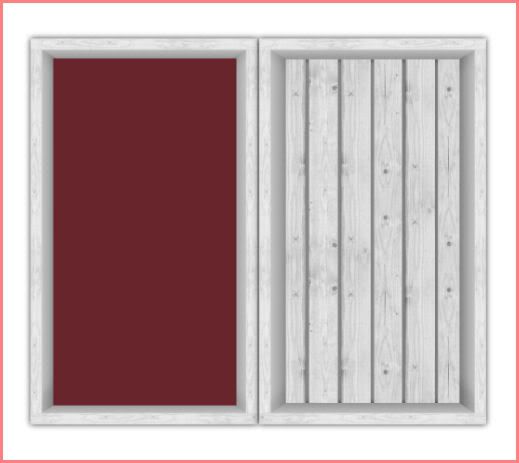
Convert the rectangle to a raster layer. Grab your magic wand tool, tolerance set to 100, feather set at 15. Click on the rectangle so that there are marching ants all around it. Open up a paper from the kit. Resize by 70%, smartsize. Copy and paste as a new layer onto your canvas. Position it to your liking within the selection. Go to selections > invert. Hit delete 2 -3 times. Deselect. Duplicate the rectangle and the paper layer. Mirror the paper layer. Position the rectangle and the paper inside the other box.
Open up the tree from the kit. Resize by 65%, smartsize. Copy and paste as a new layer onto your canvas. Give it a drop shadow of H and V -2, Opacity 60, Blur 3.00. Duplicate the tree. Mirror it. Position them side by side at the top of the boxes. (see my tag for reference)
Open up a curled ribbon from the kit. Resize by 65%, smartsize. Copy and paste as a new layer onto your canvas. Go to image > free rotate. Rotate left by 45.00 degrees, both boxes unchecked. Give the ribbon a drop shadow of H and V 2, Opacity 60, Blur 3.00. Duplicate the ribbon. Go to image > mirror. Then, image > flip. Arrange the ribbons to your liking within the wooden boxes. (see my tag for reference)
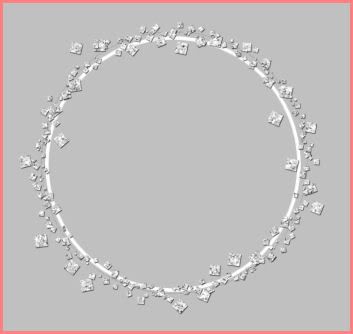
Open up glitter frame 1 from the kit. Resize by 45%, smartsize. Go to adjust > sharpen. Copy and paste the frame as a new layer onto your canvas. Center in the boxes. Go to your materials palette and change your background color to null and your foreground color to white. Grab your preset shape tool - ellipse - circle. Make sure your line style is on solid and your line width set to 4.00. Draw out a circle that is about the same size as the frame like this:
Convert your circle to a raster layer. Go to adjust > add/remove noise > add noise. Apply with Uniform and Monochrome checked, Value set to 60.
Still on your circle layer, grab your magic wand tool, tolerance set to 100, feather set to 0.00. Click inside the empty space of the circle. Go to selections > modify > expand by 2.00. Open up a paper from the kit. Resize by 50%, smartsize. Copy and paste as a new layer onto your canvas. Position to your liking within the selection. Go to selections > invert. Hit delete. Deselect. Drag your paper layer beneath the circle and frame layer. Highlight your glitter frame and give it a drop shadow of H and V 2, Opacity 45, Blur 4.00.
Open up your tube. Resize as necessary, bicubic. Copy and paste as a new layer onto your canvas. Give yoru tube a drop shadow of H and V 0, Opacity 35, Blur 10.00. Arrange the tube to your liking. Duplicate the tube. Drag the bottom tube layer beneath your circle layer. Grab your magic wand tool again, same settings as before. Highlight your circle layer and click inside the empty space so that there are marching ants all around it. Go to selections > modify > expand by 2.00. Hide your top tube layer and highlight your bottom tube layer. Go to selections > invert. Grab your eraser too, size 35, opacity 100. Carefully erase the parts of the tube you don't want hanging out of the frame. Deselect. Unhide and highlight your top tube layer and repeat with the eraser tool.
Open up an organza wrap from the kit. Resize by 42%, smartsize. Copy and paste as a new layer onto your canvas. Give it a drop shadow of H and V 0, Opacity 40, Blur 5.00. Position to your liking over your tube. Grab your freehand selection tool, feather set to 1.00. Carefully select around the ends that are hanging over the frame. Hit delete and deselect.
Open up the clock from the kit. Resize by 25%, smartsize. Copy and paste as a new layer onto your canvas. Give it a drop shadow of H and V 0, Opacity 65, Blur 6.00. Position at the the bottom of the boxes underneath the frame paper. (see my tag for reference)
Open up a button 2 from the kit. Resize by 45%, smartsize. Copy and paste as a new layer onto your canvas. Give it a drop shadow of H and V 0, Opacity 65, Blur 6.00. Position next to the clock.
Open up flower 2 from the kit. Resize by 25%, smartsize. Copy and paste as a new layer onto your canvas. Give it a drop shadow of H and V 0, Opacity 65, Blur 6.00. Duplicate. Go to image > mirror. Position the flowers as in my tag above.
Open up the butterfly from the kit. Resize by 25%, smartsize. Copy and paste as a new layer onto your canvas. Give it a drop shadow of H and V 0, Opacity 60, Blur 5.00. Position at the bottom of the glitter frame.
Open up a droopy bow from the kit. Resize by 30%, smartsize. Copy and paste as a new layer onto your canvas. Give it a drop shadow of H and V 0, Opacity 60, Blur 5.00. Position at the top right corner of the right box.
Open up a tulip from the kit. Resize by 15%, smartsize. Copy and paste as a new layer onto your canvas. Give it a drop shadow of H and V 0, Opacity 60, Blur 5.00. Positon it at the top left corner of the left box.
Open up a wavy flower from the kit. Resize by 15%, smartsize. Copy and paste as a new layer onto your canvas. Give it a drop shadow of H and V 0, Opacity 60, Blur 5.00. Positon it at the bottom right corner of the right box.
Open up a satin flower from the kit. Resize by 35%, smartsize. Copy and paste as a new layer onto your canvas. Give it a drop shadow of H and V 0, Opacity 60, Blur 5.00. Position it at the bottom left corner of the left box.
Open up a blue bells from the kit. Resize by 50%, smartsize. Copy and paste as a new layer onto your canvas. Go to image > free rotate. Rotate left by 90.00 degrees, both boxes unchecked. Give them a drop shadow of H and V 0, Opacity 65, Blur 6.00. Arrange them at the top right of the boxes. Duplicate the blue bells. Go to image > mirror. Position them side by side. Drag them beneath both your box layers. They should be peeking out from beneath your boxes. (see my tag for reference) Duplicate both sets of blue bells. Flip them. Arrange them in the same way at the bottom of the boxes.
Highlight your white background. Open up glitter frame 2 from the kit. Resize by 35%, smartsize. Go to adjust > sharpen. Copy and paste as a new layer onto your canvas. Apply Mura Meister Copies with the following settings:
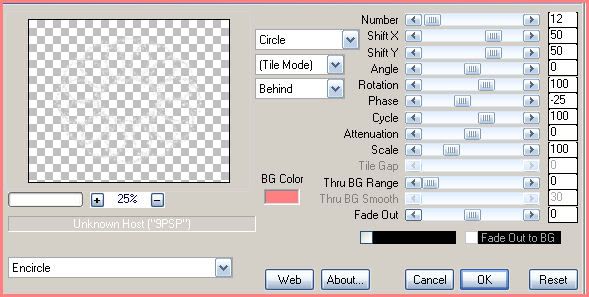
Center the layer behind your boxes. Give the layer a drop shadow of H and V -2, Opacity 50, Blur 3.00.
Highlight your white background again. Open up a paper from the kit. Copy. Add a new raster layer to your working image. Go to selections > select all. Paste the paper into the selection. Deselect. Apply Becky Mask 022 with the following settings:
Source Luminance
Fit to Canvas
Hide all Mask
Delete the mask, answer yes and merge the group.
Add any other embellishments of your choosing.
Crop and resize to your liking.
Add your copyright info, watermark and your text. Save as JPG or PNG.
I hope you enjoyed this tutorial! If you have any questions, just give me a shout.
Subscribe to:
Post Comments (Atom)
0 comments:
Post a Comment