Tuesday, May 3, 2011
 Sugar Lips
This tutorial was written by me on 13 June 2009. Any similarities to other tutorials is purely coincidental.
Supplies Needed:
Tube or close up of choice. I am using the awesome artwork of Jamie Kidd. This tube was purchased when CILM was still open. You can now find her artwork at CDO.
Scrapkit. I used My Lips Like Sugar by Scraps with Attitude. If you wish to purchase this kit, you can here. Thank you, Missy!!
Template 170 made by me, which you can find here.
Sugar Lips animation made by me
Font of choice. I used Lindsay To Die For (pay font)
Plugins:
Eyecandy 4000 - Gradient Glow
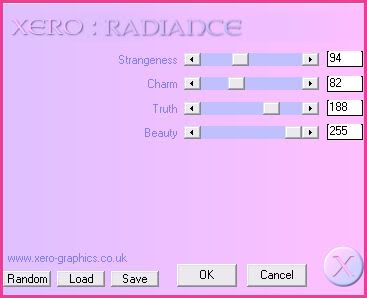
Xero Filters - Radiance
Screenworks - Chain Link
Mura Meister - Copies
Animation Shop
Supplies HERE
*~*~*~*~*~*~*~*~*~*~*~*~*~*~*~*~*~*~*~*~*~*~*~*~*~*~*~*~*~*~*~*~*~*~*~
Ok! Let's get started! Open up my template. Duplicate by holding down shift + d. Close the original. Delete the credit info layer.
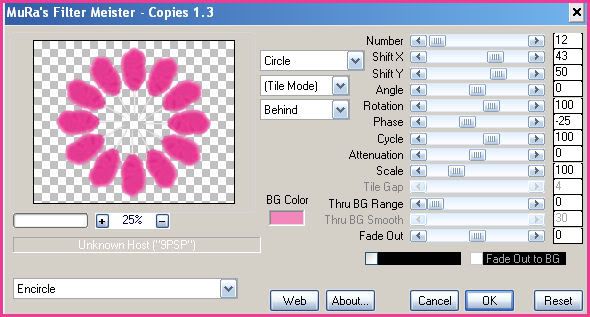
Highlight your white background layer. Open up the cotton candy from the kit. Resize by 35%, smartsize. Copy and paste as a new layer onto your canvas. Apply Mura Meister - Copies with the following settings:
Go to adjust > blur > gaussian blur. Apply with a radius of 15.00. Apply Screenworks - Chain Link. Now apply Xero Radiance with the following settings:
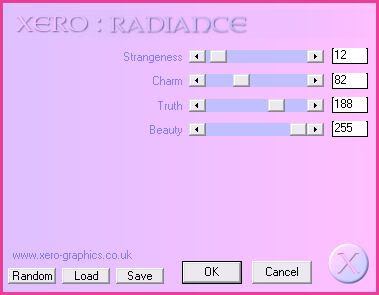
If you would like the layer lighter, repeat radiance, same settings, one more time.
Still on the blurred, chain link layer. Select, float and defloat. Open up the danglies from the kit. Resize by 50%, smartsize. Copy and paste onto your canvas. Position to your liking within the selection. Hit delete 2-3 times. Repeat, this same step, putting the danglies somewhere else within the selection.
Open up 2 sequins of choice. Resize one by 60%, smartsize, and the other by 45%, smartsize. Copy and paste the larger sequins onto your canvas. Duplicate. Go to image > mirror. Position them to your liking. Copy and paste the smaller sequins onto your canvas. Go to image > free rotate. Rotate left by 90.00, both boxes unchecked. Duplicate. Go to image > mirror. Position them to your liking. Drag the 2 larger sequin layers beneath your blurred chainlink layer.
Highlight the circle layer. Go to selections > select all. Selections > float. Selections > defloat. Open up a paper from the kit. Resize by 70%, smartsize. Copy and paste the paper as a new layer onto your canvas. Go to selections > invert. Hit delete on your keyboard. Deselect (CTRL+D). Give the layer a drop shadow of H and V 0, Opcity 80, Blur 15.00. Delete the pink circle layer.
Open up a bracket from the kit. Resize by 35%, smartsize. Copy and paste as a new layer onto your canvas. Give it a drop shadow of H -3, V 0, Opacity 65, Blur 5.00. Duplicate the bracket. Go to image > mirror. Position the brackets on either side of the circle. (see my tag for reference)
Highlight the dotted circle layer. Select, float and defloat. Open up paper from the kit. Resize by 70%, smartsize. Copy and paste as a new layer onto your canvas. Selections > invert. Hit delete and deselect. Give the layer a drop shadow of H and V 1, Oapcity 65, Blur 2.00. Delete the gray dotted circle layer.
Highlight the rectangles layer. Apply Gradient Glow with the following settings:

Repeat the Gradient Glow using the same color. Now apply gradient glow, color - WHITE, 2x. Apply Gradient Glow using the pink color, 2x. Now give the layer a drop shadow of H and V 0, Opacity 75, Blur 7.00.
Open up the white lips from the kit. Resize by 15%, smartsize. Copy and paste onto your canvas. Apply Gradient Glow, same settings, using the pink color. Duplicate the lips. Go to image > mirror. Position them to your liking on the rectangles. Lower the opacity of both lips layers to 55.
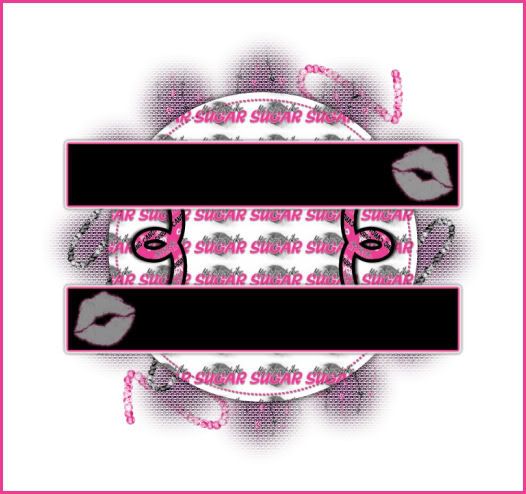
Hide the 4 frames layer, the middle frame layer, the 4 frames fill layer, and the middle frame fill layer. Merge your visible layers together. Copy merged. Open up Animation Shop. Paste as a new animation in AS. This is what should be pasted in AS:
Duplicate until you have a total of 3 frames. Select all frames (CTRL+A).
Open up the sugar lips mng file. Select all frames (CTRL+A). Copy. Highlight your tag animation. Go to edit > paste into selected frame. Position the words in the center of the rectangles. Left click your mouse.
Back to Paint Shop Pro to finish making our tag. Unhide the rest of the template layers. Highlight the 4 frames fill layer. Select, float and defloat. Open up a paper from the kit. Resize by 60%, smartsize. Copy and paste as a new layer onto your canvas. Selections > invert. Hit delete on your keyboard. Don't deselect yet!
Open up your close up. Resize, if necessary, bicubic. Copy and paste as a new layer onto your canvas. Position it to your liking. Duplicate the tube. Hide the top tube layer. Highlight the bottom tube layer and hit delete. Deselect. Apply Xero Radiance with the following settings:
Give the layer a drop shadow of H and V 0, Opacity 65, Blur 6.00. Duplicate. Change the bottom tube blend mode to Multiply and the top to Overlay. Duplicate the Overlay tube layer. Delete the pink 4 frames fill layer. Drag the hidden tube layer above your middle frame fill layer.
Highlight your middle frame fill layer. Select, float and defloat. Add a new raster layer. Floodfill the new layer with a color of choice. Unhide and highlight your hidden tube layer. Selections > invert. Hit delete. Deselect. Apply Xero Radiance, same settings as before. Change the blend mode to Luminance (Legacy). Delete the pink middle frame fill layer.
Highlight your middle frame layer. Select, float and defloat. Open up a paper from the kit. Resize by 65%, smartsize. Copy and paste as a new layer onto your canvas. Selections > invert. Hit delete and deselect. Give the layer a drop shadow of H and V 0, Opacity 85, Blur 6.00. Delete the pink middle frame layer.
Highlight the 4 frames layer. Select, float and defloat. Open up a paper from the kit. Resize by 65%, smartsize. Copy and paste onto your canvas. Selections > invert. Hit delete and deselect. Give the layer a drop shadow of H and V 0, Opacity 85, Blur 8.00. Delete the pink 4 frames layer.
Highlight the 4 frames fill layer. Select, float and defloat. Open up your tube. Resize, bicubic, so it fits within one of the squares. Mirror the tube. Copy and paste onto your canvas. Position so that it fits into the top right square. Selections > invert. Hit delete. Deselect. Give the tube a drop shadow of H and V 0, Opaciyt 65, Blur 5.00. Lower the opacity to 70. Duplicate the tube. Go to image > mirror. Position the duplicated tube in the bottom left square.
Open up a ribbon knot from the kit. Resize by 20%, smartsize. Copy and paste onto your canvas. Give ita drop shadow of H and V 0, Opacity 60, Blur 5.00. Duplicate. Go to image > flip. Position them to your liking.
Open up a buckle from the kit. Resize by 10%, smartsize. Copy and paste onto your canvas. Give it a drop shadow of H and V 0, Opacity 60, Blur 4.00. Duplicate. Go to image > mirror. Positionone at the right side of the bottom rectangle, and the other at the left side of the top rectangle.
Open up an eyelet ribbon from the kit. Resize by 15%, smartsize. Copy and paste onto your canvas. Give them a drop shadow of H and V 0, Opacity 60, Blur 5.00. Go to image > free rotate. Rotate left by 90.00, both boxes unchecked. Duplicate. Go to image > mirror. Position them at the opposite sides of the rectangle from the buckles.
Add any other embellishments of your choosing.
Add your copyright info, watermark and your text.
Hide your merged layer. Merge your visible layers together. Copy. Paste as a new animation in Animation Shop. Duplicate until you have a total of 3 frames. Select all frames (CTRL+A). Copy. Highlight your other tag animation that has the "sugar lips" animation on it. Select all frames. Go to edit > paste into selected frame. Position and left click your mouse. Change the frame properties to 13.
Crop and resize to your liking.
I hope you enjoyed this tutorial! if you have any questions, just give me a shout.
Subscribe to:
Post Comments (Atom)
0 comments:
Post a Comment