Wednesday, May 4, 2011
 Sexy Witch
This tutorial was written by me on 18 October 2008. Any similarities to other tutorials is purely coincidental.
Supplies Needed:
Tube of choice. I am using the wickedly sexy artwork of Mark Wasyl. I got this tube when CILM was still open. I don't know where you can find his work now, so just use a tube you like instead.
Scrapkit Toil and Trouble by Baby Cakes Scraps. If you wish to purchase this halloweeny fun kit, you can here. Don't forget to check out her blog for awesome freebies!
Template made my be.
Mask by Vix
Mask by Rachel of Enchanted by Darkness
Font of Choice. I am using Pussycat Snickers which can be downloaded here
Plug Ins
Ok! Let's begin! Open up the template. Highlight the triangle layer. Go to Selections > Select All. Selections > Float. Defloat. Open up a paper of choice. Copy and paste as a new layer onto your canvas. Go to Selections > Invert. Hit delete on your keyboard. DO NOT DESELECT. Highlight the photo layer. Open up your tube. Mirror and resize bicubic if necessary. Copy and paste your tube as a new layer onto your canvas. Position your tube to your liking within the selection. Hit delete on your keyboard. Deselect.
Change the blend mode of your photo to Hard Light. Lower the opacity of your tube layer to about 80%. Delete the gray triangle layer.
Highlight your oval layer. Select, float and defloat. Open up another paper of choice. Copy and paste as a new layer onto your canvas. Selections > Invert. Hit delete your keyboard. Selections > Invert (again). Copy your tube again. Add a new Raster Layer. Paste your tube into the selections. Deselect. Change the blend mode of the tube to Luminance and lower the opacity to 80%. Delete the gray oval layer.
Open up a ribbon bow of choice. Resize by 55%, smartsize. Copy and paste as a new layer onto your canvas. Position where the triangel and oval meet. Give the ribbon bow a drop shadow of H and V 0, Opacity 60, Blur 4.00.
Add any other embellishments of your choosing. Highlight your white background layer. Copy and paste a paper of choice onto your canvas. Apply Vix's mask, fit to canvas. Delete the mask, answer yes and merge the group. Resize the mask layer by 90%, smartsize. Position to your liking.
Highlight your white background. Add a new raster layer. Floodfill with a dark grey. Apply the EBD Mask. Delete the mask, answer yes and merge the group. Resize the mask by 90%, smartsize.
Open up your tube. Resize, bicubic if necessary. Position to your liking. Give your tube a drop shadow of H and V 0, Opacity 65, Blur 10.00.
Add your copyright info, and watermark. Merge your visible layers together. Crop and resize to your liking. If you are not animating, add your text and you are done. If you are let's continue!
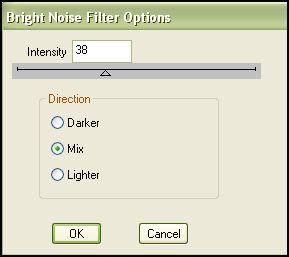
Type out your text and position to your liking. On your text layer add DSB Flux Bright Noise with the following settings:
Give your text a drop shadow of H 1, V 0, Opacity 75, Blur 2.00 Copy merged and open up Animation Shop. Paste as a new animation in AS.
Back to PSP. Go to Edit Undo 2x ( to undo the bright noise and the drop shadow) Apply Bright Noise, but this time click the Mix button 2x. Give your text the same drop shadow. Copy merged and paste after your current frame in AS.
Repeat the above step one more time for a total of 3 frames.
Optimize and save as gif.
I hope you enjoyed this tutorial. If you have any questions, give me a shout. :-)
Subscribe to:
Post Comments (Atom)
0 comments:
Post a Comment