Tuesday, May 3, 2011
 Purple Geisha
This tutorial was written by me on 19 March 2009. Any similarities to other tutorials is purely coincidental.
Supplies Needed:
Tube of choice. I am using the stunning artwork of Sandra Chang. If you wish to use her artwork, you must purchase a license with MPT.
Pretty Birdie scrapkit by Candy's Treats. If you wish to purchase this scrapkit, you can here. Don't forget to go to her blog and get the awesome freebie add on!! Thank you, Diane!!
Image of choice. The one I used came from www.sxc.hu .
Becky Mask 009. Unforunately, her site is now closed. :-(
Font of choice. I used Orchidee Light which you can download here.
No outside plugins needed
Supplies HERE
*~*~*~*~*~*~*~*~*~*~*~*~*~*~*~*~*~*~*~*~*~*~*~*~*~*~*~*~*~*~*~*~*~*~*~*~*~*~*~*
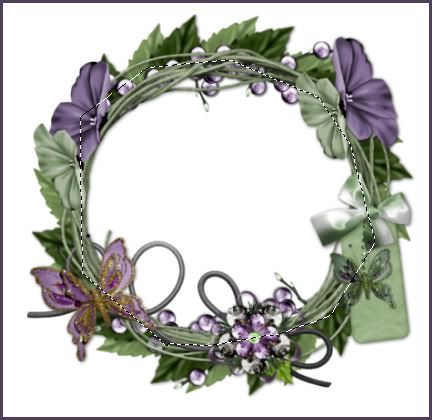
Let's get started! Open up a new transparent mage 800 x 650. Floodfill with white. Open up a circle frame of choice from the kit. Resize by 75%, smartsize. Copy and paste onto your canvas. Grab your freehand selection tool, type point to point, feather set at 0. Draw a crude circle outlining the inside of the frame like this:
Open up a glitter tile from the kit. Resize by 75%, smartsize. Copy and paste onto your canvas. Selections > invert. Hit delete. Don't deselect. Open up your image of choice. Resize as necessary, smartsize. Copy and paste onto your canvas. Position to your liking within the selection. Hit delete on your keyboard. Open up the heart sparkle from the kit. Copy and paste onto your canvas. Position to your liking within the selection. Hit delete. Deselect (CTRL + D).
Drag your frame to the top of your layer palette. Give it a drop shadow of H and V 0, Opacity 70, Blur 7.00. Highlight your image layer. Lower the opacity to about 65%.
Open up the envelope from the kit. Resize by 30%, smartsize. Copy and paste onto your canvas. Give it a drop shadow of H and V 0, Opacity 60, Blur 4.00. Position to your liking on the frame.
Open up the safety pin dangler. Resize by 30%, smartsize. Copy and paste onto your canvas. Give it a drop shadow of H and V 0, Opacity 65, Blur 4.00. Position to your liking on the frame.
Open up your tube. Resize as necessary, bicubic. Copy and paste onto your canvas. Give it a drop shadow of H -6, V -2, Opacity 60, Blur 7.00. Position to your liking.
Open up 2 flowers of choice. Resize one by 30%, and the other by 25%, smartsize. Copy and paste onto your canvas. Give the m both a drop shadow of H and V 0, Opacity 50, Blur 4.00. Duplicate each flower one time each. Mirror and flip the duplicates. Position to your liking around your tube.
Open up a bird on branch of choice. Resize by 45%, smartsize. Copy and paste onto your canvas. Give it a drop shadow of H -2, V 0, Opacity 65, Blur 3.00. Position to your liking.
Highlight your white background. Open up both gems. Copy and paste onto your canvas. Give them a drop shadow of H and V 1, Opacity 60, Blur 3.00. Duplicate each gem layer 1 time each. Mirror and flip the duplicates. Position them to your liking.
Open up the foliage. Copy and paste onto your canvas. Select, float and defloat. Open up a paper from the kit. Resize by 75%, smartsize. Copy and paste onto your canvas. Selections > invert. Hit delete and deselect. Give the layer a drop shadow of H and V 1, Opacity 40, Blur 2.00. Resize by 90%, smartsize. Duplicate. Go to image > mirror. Position the 2 paper foliage layers to your liking. Delete the black foliage layer.
Open up the glitter path from the kit. Resize by 74%, smartsize. Copy and paste onto your canvas. Give it a drop shadow of H and V 0, Opacity 50, Blur 2.00. Duplicate the glitter path 2 times. Mirror one of them and flip the other. Position to your liking.
Highlight your white background. Add a new raster layer. Make one of the glittertiles your background on your materials palette. Floodfill your new layer with the glitter.
Apply Becky mask with the following settings:
Source Luminance
Fit to Layer
Hide all Mask
Delte the mask, answer yes and merge the group. Duplicate the mask. Mirror the duplicated mask. Position the mask layers to your liking. Merge both mask layers together.
Crop and resize to your liking.
Add your copyright info, watermark and text. If you are not animating, save as JPG or PNG.
If you are animating, highlight the merged mask layer. Go to adjust > add/remove noise > add noise. Add noise with Random and Monochrome checked, value set at 20. Copy merged. Open op Animation Shop. Paste as a new animation in AS.
Back to PSP. Go to edit > undo add noise. Apply noise again, but change the value to 32. Copy merged. Paste after frame 1 in AS.
Back to PSP. Edit > undo noise. Apply noise again, but change the value to 40. Copy merged. Paste after frame 2 in AS.
Back to PSP. Edit > undo noise. Apply noise again, but change the value to 29. Copy merged. Paster after frame 3 in AS.
Select all frames (CTRL+A) Change the frame properties to 13.
Optimize and save as gif.
I hope you enjoyed this tutorial! If you have any questions, just give me a shout!
Subscribe to:
Post Comments (Atom)
0 comments:
Post a Comment