Monday, May 2, 2011
 Pixie Dreams
 This tutorial was written by me on the 17th January 2011. Any similarities to other tutorials is purely coincidental.
Supplies needed:
Tube of choice. I am using the lovely artwork of Rachel Anderson. I purchased this tube through CILM, which is now closed. You can now purchase her work with CDO.
Scrap kit. I am using Pixie Dusk made by me. If you would like to purchase it, you can here, here, here, here , here or here.
Babes Designz Mask 40. You can grab it here. Thanks Marcia!
Font(s) of choice. I used Gwendolyn and Waterlily. These are both pay fonts so I can't supply.
Plugins:
Unplugged Tools - Interlace
Alien Skin Xenofex 2 - Constellation
Babes Designz Mask 40. You can grab it here. Thanks Marcia!
Font(s) of choice. I used Gwendolyn and Waterlily. These are both pay fonts so I can't supply.
Plugins:
Unplugged Tools - Interlace
Alien Skin Xenofex 2 - Constellation
~*~*~*~*~*~*~*~*~*~*~*~*~*~*~*~*~*~*~*~*~*~*~*~*~*~*~*~*~*~*~*~*~*~
Let's get started, shall we? Open up a new transparent image, 700 x 700 pixels. Floodfill with white.
Open up the berry mask from the kit. Resize by 65% bicubic. Copy and paste as a new layer onto your canvas. Grab your magic wand tool tolerance and feather set to 0. Click inside the empty space of the frame so that there are marching ants outlining the inside of the frame. Go to selections > modify > expand by 2. Open up a paper from the kit. Resize by 50%, bicubic. Copy and paste as a new layer onto your canvas. Position the paper to your liking within the selection. Go to selections > invert. Hit delete on your keyboard. Don't deselect yet!!
Open up a stars deco from the kit. Resize by 45%, smartsize. Copy and paste as a new layer onto your canvas. Position to your liking within the frame. Hit delete on your keyboard. Deselect (CTRL + D) Give the stars deco a drop shadow of H 2, V 0, Opacity 65, Blur 5.00. Highlight your berry frame layer and give it a drop shadow of H and V 0, Opacity 70, Blur 8.00. Drag your paper layer beneath your frame layer.
Open up the Rock and Grass from the kit. Resize by 50%, smartsize. Copy and paste as a new layer onto your canvas. Position it at the bottom right of the berry frame. Give it a drop shadow of H and V 3 Opacity 50 Blur 5.00.
Open up a grass cluster from the kit. Resize by 40%, smartsize. Copy and paste as a new layer onto your canvas. Position it at the bottom left of your berry frame. Give it a drop shadow of H -3, V 3, Opacity 50, Blur 5.00.
Open up Ribbon Bow 1 from the kit. Resize by 50%, smartsize. Copy and paste as a new layer onto your canvas. Go to image > free rotate. Rotate left by 45.00 degrees, both boxes unchecked. Position the ribbon on the left side of your berry frame. Give it a drop shadow of H -2 and V -2 ,Opacity 50, Blur 3.00.
Highlight your paper layer. Open up Mushroom 3 from the kit. Resize by 25%, bicubic. Copy and paste as a new layer onto your canvas. Position it to your liking or see my tag for reference. Give it a drop shadow of H 2, V -1, Opacity 50, Blur 5.00.
Highlight your paper layer. Open up Mushroom 3 from the kit. Resize by 25%, bicubic. Copy and paste as a new layer onto your canvas. Position it to your liking or see my tag for reference. Give it a drop shadow of H 2, V -1, Opacity 50, Blur 5.00.
Highlight your white background layer. Open up Flowers Deco 2 from the kit. Resize by 60% smartsize. Copy and paste as a new layer onto your canvas. Position towards the bottom of your canvas. (see my tag for reference) Give it a drop shadow of H 0, V 3, Opacity 60, Blur 5.00.
Open up Botanical Flower 2 from the kit. Resize by 60% smartsize. Copy and paste as a new layer onto your canvas. Position towards the top of your canvas. Give it a drop shadow of H 0 V -3, Opacity 60 Blur 5.00.
Open up the Standing Lantern from the kit. Resize by 75%, bicubic. Copy and paste as a new layer onto your canvas. Position to the right of the canvas. (see my tag for reference) Give it a drop shadow of H 2, V 0, Opacity 60, Blue 3.00.
Highlight your top layer. Open up your tube. Resize as necessary bicubic. Copy and paste as a new layer onto your canvas. Position it to your liking. Give it a drop shadow of H and V 0 Opacity 70 Blur 15.00.
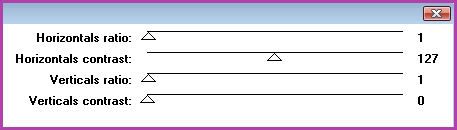
Hide your white background layer. Copy merged. Paste as a new layer onto your canvas. Drag the layer down on your layer palette until it's right above the white background layer. Go to adjust > guassian > blur. Appy with a radius of 15. Apply Unplugged Tools - Interlace with the following settings:
Hide your white background layer. Copy merged. Paste as a new layer onto your canvas. Drag the layer down on your layer palette until it's right above the white background layer. Go to adjust > guassian > blur. Appy with a radius of 15. Apply Unplugged Tools - Interlace with the following settings:
Open up a paper from the kit. Copy and paste as a new layer onto your canvas. Apply Babes Designz Mask 40 with the following settings:
Source Luminance
Hide all Mask
Fit to Canvas
Invert Transparency ticked
Delete the mask from you layer palette and merge the group. Resize the mask layer by 85%, smartsize. GIve it a drop shadow of H 2 V 0, Opacity 40 Blur 4.00.
Open up the pixie dust from the kit. Resize by 75%, bicubic. Copy and paste as a new layer onto your canvas. Position to the upper right of the berry frame. Duplicate. Go to image > Mirror. Then, image > flip. Drag both pixie dust layers beneath your mask layer.
Highlight your top layer. Open up the sparrow from the kit. Resize by 35%, smartsize. Copy and paste as a new layer onto your canvas. Position to your liking. Give it a drop shadow of H 4 V 0, Opacity 55 Blur 7.00.
Add your copyright info, watermark and your text. If you are animating, save as JPG or PNG.
If you are animating highlight your tube layer. Grab your selection tool, type point to point. Select around the area that you would like to sparkle. Apply Xenofex 2 Constellation with the following settings:

Deselect. Copy merged. Open up Animation Shop. Paste as a new animation in AS. Back to PSP. Go to edit > undo > select none. Edit > undo constellation. Apply constellation again, same settings, but hit the random seed button. Deselect. Copy merged. Paste after your current frame in AS.
Repeat the above steps 2 more times for a total of 4 frames. In AS, select all frames (CTRL + A) Change the frame properties to 13.
Optimize and save as gif.
I hope you enjoyed this tutorial! If you have any questions, just give me a shout.
Subscribe to:
Post Comments (Atom)
0 comments:
Post a Comment