Wednesday, May 4, 2011
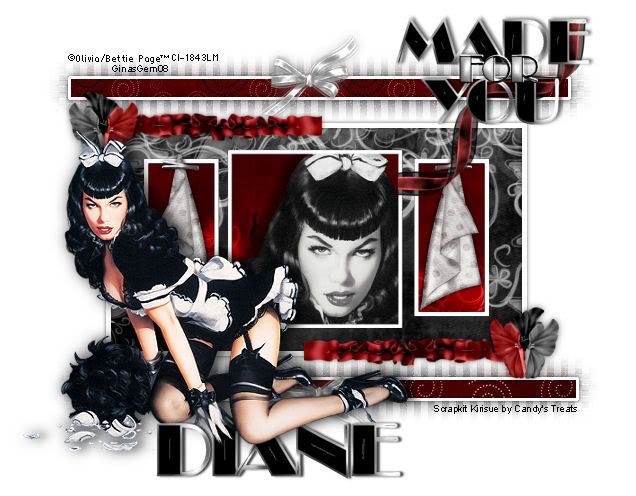
 Made for You
This tutorial was written by me on 23 September 2008. Any similiarities to other tutorials is purely coincidental.
Supplies Needed:
2 tubes of choice. Prefereably one of them a close up. I'm using the fantastical artwork of Olivia. I got this tube when CILM was still open. You can find her at CDO now.
Scrapkit. I'm using Kirisue by Candy's Treats. You can purchase this elegant scrapkit at her store here, or here. (don't forget to check out her blog for awesome freebies!!)
Template made by me
Wordart made by me
Font of choice. I used Broadway (pay font)
Filters Needed:
Okies! Let's begin! Open up my template and delete the credits. Highlight the middle rectangle layer. Grab your magic wand tool, tolerance 30.00, feather 0.00, mode:add. Click on the rectangle, so you have marching ants all around it. Open up a paper of choice from the srapkit. Copy the paper and paste as a new layer onto your canvas. Position to your liking. Go to Selections > Invert. Hit delete on your keyboard. Deselect (CTRL+D) Highlight the middle rectangle frame layer, and give it a drop shadow of H and V 0, opacity 80%, Blur 10.00 Delete the grey middle ractangle layer.
Highlight the Picture Fill layer. Grab your magic wand tool again (same settings as before, and click on all three rectangles, so you have marching ants all around them. Open up another paper of choice. Paste as a new layer onto your canvas. Go to Selections > Invert. Hit delete on your keyboard. Deselect (CTRL+D).
Highlight the black Picture Fill layer. Grab your magic wand, and click on the middle rectangle. Open up your first tube of choice (the close up). Resize if necessary, bicubic. Paste as a new layer onto your canvas and position to your liking. Go to Selections > Invert. Hit delete on your keyboard. Deselect.
On your tube layer, apply the filter Xero Greytinter with the following settings:
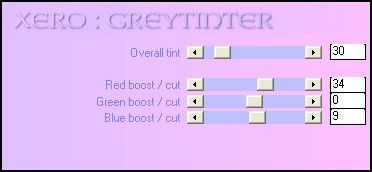
Give your tube a drop shadow of H and V 0, Opacity 70, Blur 10.00. Delete the black Picture Fill layer. Give your picture frames layer a drop shadow of H and V 0, Opacity 60, Blur 10.00.
HIghlight your skinny rectangles layer. Grab your magic wand tool (same settings) and click once in each of them until you have marching ants both of them. Open up another paper of choice and paste as a new layer onto your canvas. Go to Selections > Invert. Hit delete on your keyboard. Deselect. Highlight your skinny rectangles frames and give it a drop shadow of H and V 0, Opacity 60, Blur 10.00. Delete the grey skinny rectangles layer.
Open up a folded paper of choice. Resize by 30%, smartsize. Give it a drop shadow of H and V 0, Opacity 50, Blur 5.00. Position the fold in the middle of the left picture frame rectangle. I applied greytinter with the same settings that I gave my tube, but this is totally optional. Open up a staple of choice. Resize by 50%, smartsize, and position on top of the fold so it looks as if the staple is holding the fold in place. Duplicate the fold and staple. Go to Image > Mirror. Position the the mirrored fold and staple in the mddle of the right picture frame rectangle.
Open up a ruffle of choice. Resize by 30%, smartsize. Paste onto your canvas and place in the left, upper corner of your middle rectangle layer. Give it a drop shadow of H and V 0, Opacity 50, Blur 5.00. Duplicate the ruffle. Go to Image > Mirror. then Image > Flip. Place the duplicated ruffle in the right bottom corner of the middle rectangle.
Open up a flower of choice. Resize by 20%, smartsize. Paste onto your canvas and place over the end of your ruffle. Give it the same drop shadow you gave your ruffle. Duplicate and mirror the flower. Place the duplicated flower on the end of your other ruffle.
Open up a bow of choice. Resize by 40%, smartsize. Paste onto your canvas and position to your liking. Give it the same drop shadow you gave your flowers.
Open up a curl of choice. Resize by about 30%, smartsize. Position to your liking and give it the same drop shadow as your bow.
Add any other embellishments of your choosing. Open up your main tube. Resize as necessary, bicubic. Give it a blurry drop shadow and place to your liking.
Open up the word art. Position to your liking. Add your copyright info, watermark, and other text you like. Crop and resize to your liking. Save as PNG or JPG.
I hope you enjoyed this tutorial. If you have any questions, just give me a shout or send an email! Happy Tagging!
Subscribe to:
Post Comments (Atom)
0 comments:
Post a Comment