Wednesday, May 4, 2011
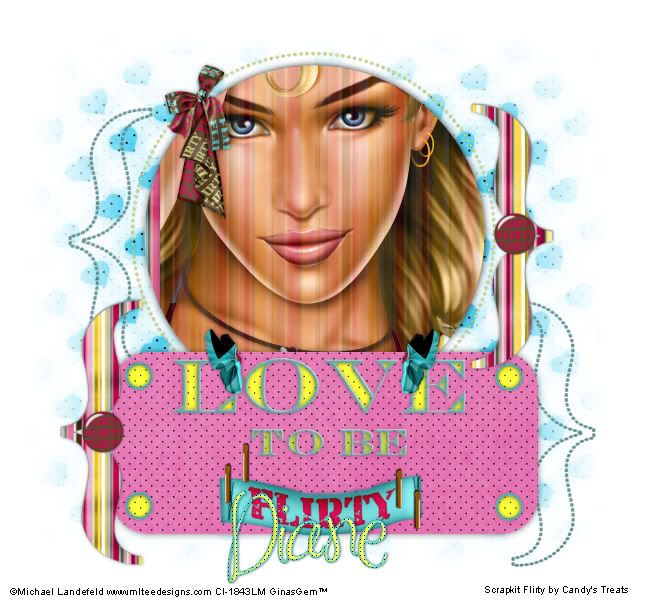
 Love to be Flirty
This tutorial was written by me on 23 October 2008. Any similarities to other tutorials is purely coincidental.
Supplies Needed:
Close up tube or image of choice. I am using the sexy artwork of Michael Landefeld. I got this tube when CIlm was still open. You can find him at CDO now.
Scrapkit Flirty by Candy's Treats If you wish to purchase this flirty scrapkit, you can here
Template #10 made by me. It can be downloaded here
Mask by Vix. Check out her great shares under goodies!
Font of choice. I am using MA Sexy which can be downloaded here
No outside plugins needed
Let's begin! Open up my template and delete the credits. Highlight your white background. Open up a paper of choice from the kit and paste as a new layer onto your canvas. Go to Layers > Load/Save Mask from disc. Find Vix's mask in the drop down menu. Apply the mask with these settings:
Source Luminance
Fit to Canvas
Hide all mask
Delete the mask on your layer palette, answer yes to the pop up box and merge the group. Resize the mask by 95%, smartsize.
Highlight the dotted circle layer. Go to selections > select all. Selections > float. Defloat. Open up a paper of choice (prefereably a brighter colored paper) resize by 69%, smartsize. Copy and paste as a new layer onto your canvas. Go to selections > invert. Hit delete on your keyboard. Deselect (CTRL+D) Give the layer a drop shadow - H 0, V 0, Opacity 50, Blur 3.00. Delete the gray dotted circle layer.
Highlight the Dotted Left Bracket layer. Select, float and defloat. Open up a paper of choice from the kit. Resize by 69%, smartsize. Copy and paste onto your canvas. Selections > invert. Hit delete on your keyboard. Give the layer a drop shadow of H and V 0, Opacity 50, Blur 3.00. Delete the gray dotted bracket layer.
Highlight the Dotted Right Bracket layer. Repeat the same steps you did for the left bracket layer.
Highlight the circle layer. Select, float and defloat. Open up a paper of choice. Resize by 69%, smartsize. Copy and paste onto your canvas. Selections > Invert. Hit delete on your keyboard. Do NOT deselect.
Open up your tube or image of choice. Resize bicubic if necessary. Copy and paste onto your canvas. Position to your liking within the circle. Hit delete on your keyboard. Deselect. Give your image/tube a drop shadow of H and V 0, Opacity 60, Blur 10.00. Lower the opacity to about 90%.
Highlight your papered circle layer. Give it the same drop shadow you gave your image/tube. Delete the gray circle layer.
Highlight your right bracket layer. Select, float and defloat. Open up a paper of choice. Resize, 65%, smartsize. Copy and paste onto your canvas and hit delete on your keyboard. Deselect. (CTRL+D) Give the layer a drop shadow of H and V 0, Opacity 60, Blur 8.00. Delete the gray bracket layer. Repeat all of these steps with the left bracket layer.
Highlight the word fill layer. Select, float and defloat. Open up a paper of choice. Resize by 69%, smartsize. Copy and paste onto your canvas. Hit delete on your keyboard. Deselect. Delete the gray wordfill layer.
Highlight the small circles fill layer. Select, float defloat. Paste as a new layer (the paper shoudl still be on your clipboard) Selections > invert. Hit delete on your keyboard. Deselect.
Highlight the rounded rectangle layer. Select, float and defloat. Open up a paper of choice. Resize by 69%, smartsize. Copy and paste the paper as a new layer onto your canvas. Selections > invert. Hit delete on your keyboard. Deselect. Give the layer a drop shadow - H and V 0, Opacity 0, Blur 12.00. Delete the gray rounded rectangle layer.
If you like, you can add papers to the word and circles outlines. Or leave them white. It's up to you. Give your outlines a drop shadow of H and V 0, Opacity 50, Blur 4.00.
Open up the Flirty label from the scrapkit. Resize by 60%, smartsize. Copy and paste onto your canvas. Position it under "to be".
Open up staples of choice. Resize by 40%, smartsize. Go to Image > Free Rotate. Rotate Left by 90.00, both boxes unchecked. Duplicate the staples. Go to Image > Mirror. Image > Flip. Position the staples so it looks as if, they are holding the label in place.
Open up a button of choice. Resize by 15%, smartsize. Paste onto your canvas. Give it a drop shadow of H and V 0, Opacity 50, Blur 4.00. Duplicate. Position the buttons to your liking.
Open up a fold of choice. Resize by 20%, smartsize. Paste onto your canvas and give it the same drop shadow you gave your button. Position to your liking.
Open up the flirty bow. Resize by 20%, smartsize. Copy and paste onto your canvas. Give it the same drop shadow you gave your fold. Position to your liking.
Add any other embellishments of your choosing. :-)
Crop and resize to your liking. Add your copyright info, watermark and text. Save as PNG of JPG.
I hope you enoyed this tutorial! If you have any questions, just leave me a shout! :-)
Subscribe to:
Post Comments (Atom)
0 comments:
Post a Comment