Wednesday, May 4, 2011
 Gorjuss Cloudy Day
This tutorial was written by me on the 3 Sepetember 2008. Any similarity to others tutorials is purely coincidental.
Supplies Needed:
Tube of choice. (A sitting tube is best. :-)) I'm using the adorable artwork of Suzanne Woolcott. If you wish to use her artwork, you must purchase a license HERE
Cloudy Skies Scrapkit by Candy's Treats. . . she has awesome freebies and PTU kits. . . you can find her blog HERE and her store HERE
Frame made by me.
Mask made by me
Word Art made by me
Font of choice. I used 2 Peas Hearts Delight (included)
Filters Needed:
Alien Xenofex 2 Constellation (for animation)
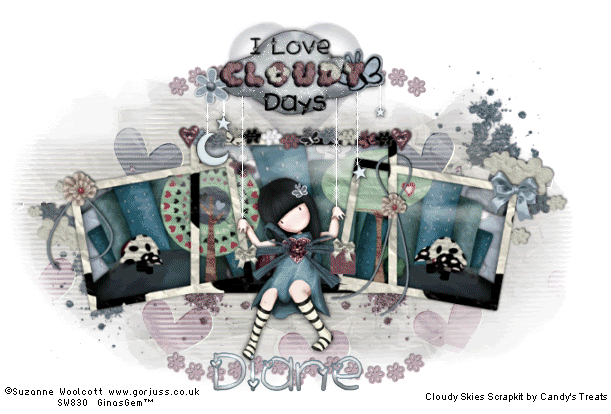
Let's Begin! Open up a transparent image 700 x 500. Flood fill with white. Open up the frame. Copy the frame layer and paste onto your canvas. Hide your white background, so you can see the frame. This step is optional. If you like the white frame skip to the next step. . . if you would like a colored frame, stay with me. lol Highlight the frame layer and go to Selections > select all. Go to selections > float. Go to selections > defloat. Open up a paper of choice from the scrapkit. Paste onto your canvas. Go to Selections > Invert. Hit delete on your keyboard. Deselect (CTRL + A). Delete the white frame layer.
Grab your magic wand, tolerance set at 20, feather 0.00. Click inside all of the empty spaces of the frame. Go to Selections > Expand > by 3.00. Open up a paper of choice. (I used papercrumpled natural) Paste as a new layer onto your canvas. Go to Selections > Invert. Hit delete on your keyboard. Do NOT deselect!
Open up one of the trees from the scrapkit. Resize by 30%, smart size. Paste as a new layer onto your cavas. Position it in the left angled frame. (see my tag for reference)
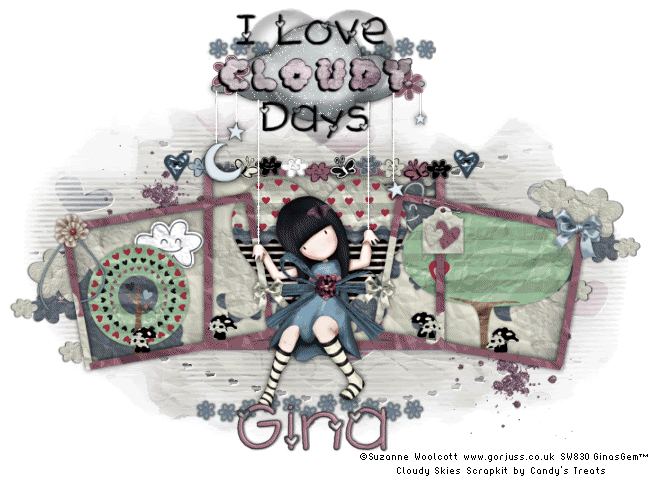
Do NOT deselect. Open up another tree from the scrapkit and position it in the right angled frame. Hit delete. Resize by about 40 percent, and position it so that half on the tree trunk will be deleted. . . this makes it look as if it is 'closer' than the other tree. Deselect. (CTRL + D) Give both trees a drop shadow of H and V 0, Opacity 55, Blur 4.00. Drag the paper layer and both tree layers beneath your frame layer.
Open up a couple of clouds of choice. Resize them by about 30 to 45%, Smart size. Place them behind your trees, so it looks as if they are peeking out from behind them.
Open up the Crumpled Heart. Resize by 30% (Smart Size) and paste as a new layer onto your canvas. Position it in the center of the middle frame. Give it the same drop shadow that you gave the trees.
If you like, add any other elements within the frame. When you are done, go back to my frame, and copy the cutout shadow layer. Paste as a new layer onto your canvas. Drag below your frame layer, but above above all of your element layers.
Paste the cutout layer so it fits perfectly within your frame. Give your frame layer a drop of H and V 0, Opacity 70, blur 8.00. Hide your white background, and merge all visible layers.
Open up your tube. Paste as a new layer onto your canvas. Resize if necessary (bicubic) Sharpen if necessary. Sit her in the middle frame. Give your tube a drop shadow if H and V 0, Opacity 75, blur 10.00.
Open up the heartglitter1 file from your scrap kit. Resize it by about 8 percent (or whatever fits over your tube's chest) Give it a drop shadow of H and V 0, opacity 50, blur 3.00.
Open up a Raffbow of choice. (I used raffbow and colorized it to match my tube) Paste as a new layer onto your canvas. Resize it by about 33%, smart size. Place it over your tube. Colorize if you like. Grab your Freehand selection tool, feather set at 0.00, selection type - point to point, mode add.

Zoom in really close, and select around the area of the raffbow that is hanging over the middle frame. . . like this:
Do the same thing with the other side of the raff bow and hit delete. Deselect (CTRL + D) Give the Raffbow the same drop shadow that you gave the heartglitter.
Open up a bow of choice. (I used bow2) Resize the bow by 7%. Paste as a new layer onto your canvas, and place over one of the ends of the raffbow. Give the bow the same drop shadow as the raffbow. Duplicate the bow and go to image > mirror. Place the duplicated bow on the other end of the raffbow. Open up a flower of choice. (I used flower) and resize by about 4%. Place over the knot in the raffbow and give it a drop shadow of H and V 0, Opavity 50%, blur 3.00. You can add some toadstools, or any other elements to your frame scene if you like. (I added some adorable toadstools) Resize as necessary and give them a small drop shadow.
Open up the rope. Resize by 40%. Paste as a new layer onto your canvas, and position it beneath your tube over the top of the middle frame (see my tag above for reference) Give it a drop shadow of H and V 0, opacity 50, blur 5.00. Open up a buttonglitter of choice. ( I used the blue heart shaped one) Resize by 25%. Place over one of the string end of the cloud rope. Give it the same drop shadow you gave your cloud rope. Duplicate the button and go to image > mirror. Place the duplicated button on the string end of the cloud rope.
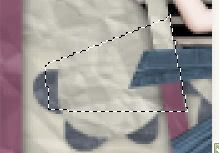
Hide your white background, and merge all visible layers. Open up another bow of choice. ( I used the lighter blue one) Paste as a new layer onto your canvas. Resize it by 10%. Position it on one of the corners of your frames (see my tag for reference) Open up a tag of choice ( I used the one with the safety pin) Resize by 30%. Give it a drop shadow of H and V 0, Opacity 50, blur 5.00. Position it in the top corners where the right frame and middle frame meet (see my tag for reference) Erase just a small part of the safety pin so it looks as if it is pinned to the frame :
I opened up one of the crumpled hearts, resized it by about 15%, gave it a small drop shadow, and placed it in the middle of the tag. Open up one of the strings, resize it by about 35%, and paste it onto your canvas. Place it over the left upper hand corner of the left frame. Give it a drop shadow of H and V 0, opacity 50, blur 4.00. Add any other embellishments that you like. ( I added a little butterfly into my tube's hair)
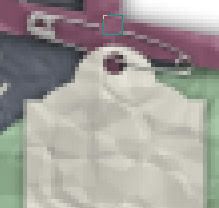
When you are satisfied, open up the bracket flowers. Resize them by 75%. Grab your free hand selection tool (point to point) Select around the top middle 11 flowers like this:
Copy. Go to your canvas, and paste as a new layer. If you wish to leave them cream colored, give them a small drop shadow ( H and V 0 O 55, blur 5.00) If you'd like to colorize them, Go to adjust > Brightness/Contrast, and adjust the brightness to -55, contrast 10. Now colorize as usual. Position the flowers underneath the tube and frames to your liking. Duplicate the flowers and go to image > flip. Position the duplicated flowers to your liking (see my tag for reference) Hide your white background and merge your visible layers.
Open up a paper of choice. I used paper 10. Highlight your white background. Go to layers > new raster layer. On the new raster layer go to selections > select all. Copy your paper of choice and on your canvas right click and choose paste into selection. Deselect (Ctl + D)
Apply the ginasgem_mask2 to the paper layer. Delete the mask, answer yes, and merge the group. Position the mask layer in the middle of your canvas. Highlight your merged frames layer and resize by 95% smart size. Go to adjust > sharpness > Unsharp mask. Apply with a radius of 5.00, strength 20, clipping 1, Luminance only box UNCHECKED.
Highlight yor mask layer. Apply the filter FM Tile Tools Blend Emboss with these settings:
Apply a drop shadow of H and V 0, Opacity 20, Blur 10.00.
Open up Clouds4. Resize by 40%, and paste onto your canvas. Give it a drop shadow with H 1, V 0 Opacity 60, Blur 3.00. Place below your frames but above your mask and place to your liking. Duplicate the clouds and mirror. Position to your liking (see my tag above for reference)
Open up the glitter splotches. Resize by 25% and position to your liking behind your frames. Add any other embellishments that you wish. Open up the I love cloudy days word art. Decorate and position to your liking. I left the I Love and Days part black, and clicked inside of the word CLOUDY, expanded the selection by 2, pasted a paper as a new layer, and inverted the selection, hit delete. I dragged the paper layer underneath the cloud layer and added a small drop shadow to the Cloudy black outline. Hide your frames layer, and your white background, and merge your word art layers together.
Crop and resize if you wish. Add your copyright info, watermark, and any other text.
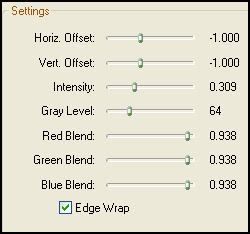
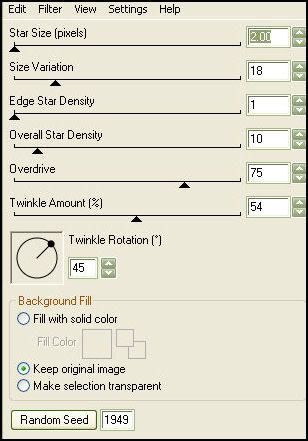
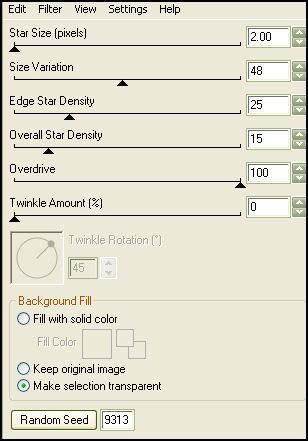
If you like, you may animate. I used Alien Skin Constellation on the strings of my tube and on the cloud.
These are the settings I used on the cloud, hitting random seed once on each new layer. :
And these are the settings I used on the strings, hitting random seed with each new layer.
I hope you enjoyed this tutorial! If you have any questions, feel free to email me.
Subscribe to:
Post Comments (Atom)
0 comments:
Post a Comment