Wednesday, May 4, 2011
 Falling Leaves

This tutorial was written by me on the 5 September 2008. Any similarities to other tutorials is purely coincidental.
This tutorial is based upon my homepage tag.
Supplies Needed :
Tube of choice. I am using the fantastical artwork of Rachel Anderson. I got this tube when CILM was still open. You can find her at CDO now.
Cosy Autumn Scrapkit by Candy's Treats. You can purchase this beautiful kit HERE She also has great freebies at her blog HERE
Mask made by me
Autumn Leaves word mask made by me
Font of choice I used AL Afternoon Delight. You can get it HERE
Animation Shop (optional)
Let's begin. Open up a new transparent image of 700 x 700. Floodfill with white. Open up one of the heart frames and paste onto your canvas. Resize by 90%, smart size.
Grab your magic wand tool, feather set at 0, and select inside of your frame. Go to Selections > Modify > Expand by 3. Open up a paper of choice (preferably a paper that contrasts with your frame) Copy and paste the paper as a new layer onto your canvas. Position how you want it within the frame and go to selections > invert. Hit delete. (Do not deselect)
Open up the embroidered ribbon and paste onto your canvas. Resize the ribbon by 75% and position it in the middle of your heart frame. When you are satisfied with the placement, hit delete. Deselect (CTRL + D) Give the ribbon a drop shadow of H and V 0, opacity 60, blur 8.00. Open up 2 leaves of choice. Preferably ones that contrast with your paper. Resize them by about 20% and paste them onto your canvas. On your first leaf of choice go to image > free rotate > rotate by about 15.00 degrees left. On the second leaf, rotate it right by 12.00. Give both leaves a drop shadow of H 1, V 0, Opacity 70, blur 3.00. Duplicate them as many times as you need to make a 'leaf line' across the heart. Drag the ribbon above your leaves. It should look somewhat like this:

Open up your tube. Resize if necessary. Paste as a new layer onto your canvas, and place to your liking in the middle of the frame. Give your tube a drop shadow of H -7, V -3, Opacity 70%, Blur 8.00. 


Highlight your frame layer and grab your magic wand tool (same settings as before) and click within the empty part of your frame. Go to Selections > Invert. Highlight your tube layer and grab your eraser tool. Erase the parts of the tube that you don't want hanging over your frame.
Highlight your frame layer and give it a drop shadow of H and V 0, opacity 48%, blur 10.00. Hide your white background and merge your visible layers.
Open up one of the butterflies and resize by 30%. Paste onto your canvas. Free rotate left, by 15.00 degrees and give it a drop shadow of H an V 0, opacity 40%, blur 5.00. Position to your liking on top of the frame. Open up one of the key ribbons, resize by 40% and paste onto your canvas. Position to your liking and give it the same drop shadow you gave your butterfly.
Open up a ric rac. (I used the one with the flowers on it) Resize by 40% and paste onto your canvas. Free rotate it left, 40.00 degrees. Give it the same drop shadow as your key. Position it along the right bottom edge of the heart frame like this:
Duplicate the ric rac, go to Image > Mirror and place on the other side of the heart frame. Open up a bow of choice. Resize by 15% and paste onto your canvas. Place it over the bottom point of the heart where the ric racs meet. Give it the same drop shadow as your ric rac.
Add any other embellishments that you like. When you are happy, hide your white background and merge your visible layers. Open up 4 or 5 different leaves. Resize them very small and rotate them in different directions, so you get a small leaf pile incorporating different leaves and colors like this:
Hide all of your layers except for the leaves, and merge the leaves together. Give the leaf pile a drop shadow with H and V 0, Opacity 45%, blur 5.00. Duplicate the leaf pile layer and resize and mirror, flip until it looks like a bigger leaf pile at the bottom of your heart, like this:
When you are satisfied, hide your white background, and merge your visible layers.
From your scrapkit, open up the Autumn tree. Resize by 90% and paste onto your canvas. Position the tree to you liking behind your heart. If you like, you can select around the bottom of the tree trunk and delete that part of the tree. Give the tree a drop shadow of H 1 V 0, Opacity 60, Blur 4.00.
Highlight your white background. Open up a paper of choice. Paste onto your canvas. Apply GinaGem_mask3. Delete the mask answer yes, and merge the group. Resize the mask by 90% and position it to your liking underneath the tree layer. Give the layer a drop shadow of H and V 0, Opacity 20, blur 4.00.
Highlight your mask layer. Open up the Autumn Leaves tube from your supplies. Paste as a new layer onto your canvas. Position to your liking over the mask.
Add your copyright info, watermark and your text. Crop and resize if you like. If you are not animating you are done. Merge your layers together and save as a PNG or JPEG file. If you are animating, do NOT merge your layers together, and let's continue on.
Open up animation shop. Copy Merged in PSP and paste as a new animation in animation shop.
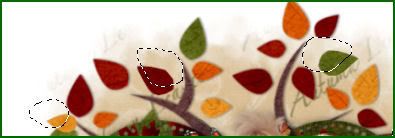
Back in PSP. Highlight your tree layer. Select 3 or 4 leaves that you wish to "fall" from the tree. With your freehand selection tool, selection type - point to point, mode - add, and feather 0.00. Zoom in REALLY close so you can see what you are doing better:
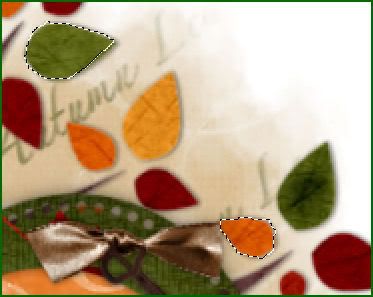
Expand your selection by 1. Copy and paste as a new image. You should have a new image that has all the leaves that you want to fall. Now back to your tag. Expand the selection by 3. Hit delete on your keyboard. Don't deselect yet because we need to know where the leaves are going to be falling from.
Back to the copied leaves image. With your freehand selection tool, select around the first leaf and copy. Paste it onto your canvas, and position it a bit lower than where the leaf originally was. Repeat this with the rest of the leaves :
Now you can deselect. (CTRL+D) Copy merged and paste after your first frame in Animation shop. Continue moving the leaves a bit lower. Each time you move your leaves, copy merge the tag and paste after the last frame you pasted in animation shop. Now when moving the leaves, don't pull them straight down. Move them a bit to the right and left as well so they look as if they are floating down. And also make sure they are "floating" down towards the leafpile.
When the leaf does it make it down to the leafpile, position it so it blends in to the rest of the leaves, and lower the opacity down to 95%. Continue until all the leaves are on the leafpile.
Highlight the first frame in Animation Shop and change the frame properties to 60. Now highlight the last frame and change the frame properties to 95. The rest of the frames should be 10. Optimize and save a gif.
I hope you enjoyed this tutorial and please feel free to contact me with any questions or suggestions.
Subscribe to:
Post Comments (Atom)
0 comments:
Post a Comment