Wednesday, May 4, 2011
 Girly Crush
This tutorial was written by me on 18 September 2008. Any similarites to other tutorials is purely coincidental.
Supplies Needed
Tube of choice. I'm using the artwork of Keith Garvey. I got this tube when was still with MPT; You can find him at PSP Tubes Emporium now.
Scrapkit. I'm using Girly Crush by Candy's Treats. If you wish to purchase this awesome scrapkit you can here or here. I also used elements from the fantastic freebie add on that you can download from her blog here
Mask by Vix. She has some wonderful masks and resources! Check her out!
Animation was created from animated design tiles which you can find here
Font of Choice. I used Roselyn. You can download it here
Filters Needed:
Animation Shop (opt)
Let's begin! Put the mask in your masks folder and your plug in in your plug ins folder. Open up a new transparent image 650 x 650. Floodfill with white. Open up notebook2 (from the freebie add on) Resize by 60%, smartsize. Paste as a new layer onto your canvas. Go to Image > Free Rotate. Rotate left by 90 degrees, both boxes unchecked. Grab your magic wand tool, tolerance set to 50, feather 0.00. Click inside the empty part of the frames that are on the notebook. Go to Selections > Modify > Expand by 5.00. Open up a paper of choice. Copy and paste as a layer onto your cavas. Go to Selections > Invert. Hit delete on your keyboard. Deselect. (CTRL+D)
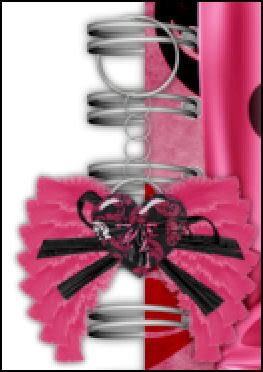
Open up your tube. Resize if necessary, and paste onto your canvas. Position your tube within the notebook frames to your liking. Give your tube a drop shadow of H and V 0, Opacity 75%, Blur 15.00. Grab your magic wand tool again. Click inside the empty spaces of the notebook frames. Go to Selections > Invert. Erase the parts of the tube that you don't want hanging out of your notebook frames. Deselect. Erase the part of the tube that is in between the frames so you have something similiar to this:

Highlight your notebook and give it a drop shadow of H and V 0, opacity 70%, Blur 7.00.
Open up a feather charm of choice. Resize by 60%, smartsize. Paste onto your canvas and give it a drop shadow of H and V 0, opacity 60, blur 5.00. Place it on top of the top ring of your notebook. Grab your eraser tool, size set at about 9, opacity 65. Carefully erase part of the charm ring so it looks as if it's hooked onto the notebook ring:
Open up a flower of choice. Resize by about 15%, smartsize. Paste onto your canvas. Position to your liking. Give it a drop shadow of H and V 0, Opacity 50, blur 4.00. Open up a raffbow of choice. Resize by about 40%, smartsize. Paste onto your canvas and postion to your liking. Give it the same drop shadow you gave your flower. Hide your white background, and merge your visible layers.
Open up the swirl. Highlight your white background. Paste onto your canvas and position to your liking. Give it a drop shadow of H 1, V 0, Opacity 40%, Blur 2.00. Duplicate the swirl. Resize by 65%, smartsize. Go to Image > Mirror. Then, Image > Flip. Position to your liking. Hide your white background and merge your visible layers.
Open up a paper of choice. Highlight your white background. Copy and paste your paper as a new layer onto your canvas. Resize the paper by 72% (all layers UNCHECKED!!) Go to Layers > Load/Save mask from disc. Find Vix Mask 173 in your drop down menu. Apply the mask with the following settings:
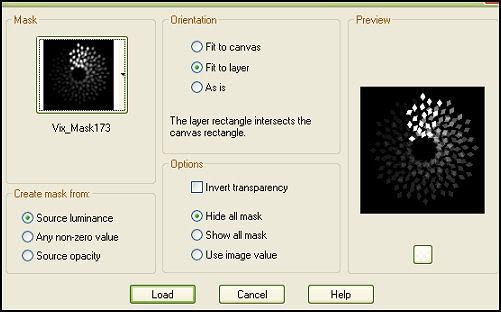
On your layer palette, delete the mask, answer yes, and merge the group.
Give your mask layer a drop shadow of H and V 0, Opacity 45, Blur 7.00. Duplicate the mask. Go to Image > Mirror. Then Image > Flip. Position the mask layers to your liking.
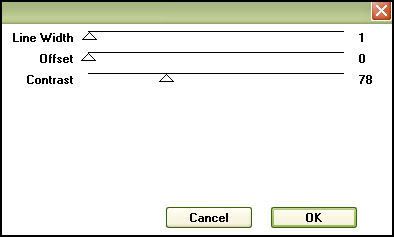
Merge the 2 mask layers together. Go to Adjust > Blur > Gaussian Blur. Radius 10.00. Apply the filter VM Transmission with the following settings:
Go to Adjust > Add/Remove Noise > Add noise and apply to your mask layer with the following settings:

Add your copyright info, watermark and text. Crop and resize to your liking. If you are not animating, save as JPG or PNG. If you are, then let's continue!
Merge all layers together. Open up Animation Shop. In Paint Shop Pro, copy your tag. Paste as a new animation in AS. Duplicate until you have 8 frames. Open up the heart animation in AS. Select all of the frames. (CTRL+A). Copy. Select all of your tag frames (CTRL+A) Go to Edit > Paste into selected frame. Position the heart animation to your liking. Resize the heart animation by 85%. Select all of the frames of the heart animation. Copy. Select all of the frames of your tag animation. Go to Edit > Paste into selected frame. Optimize and save as GIF.
I hope you enjoyed this tutorial. If you have any questions, don't hesitate to email me!
Subscribe to:
Post Comments (Atom)
0 comments:
Post a Comment