Wednesday, May 4, 2011
 Destined Friends
 This tutorial was written by me on 6 November 2008. Any similarites to other tutorials is purely coincidental. Supplies Needed: 2 tubes of choice. I am using the cool artwork of Rion Vernon. I got these tubes when CILM was still open. You can find him at CDO now. Scrapkit Destiny by Butterfly Blush Designs. If you wish to purchase this scrapkit you can here. Thank you Brooke! Template 27 made by me. You can download it from my blog here Mask by Vix. Don't forget to check out her other great resources!! Font of choice. I used A Yummy Apology which you can download here Plugins Animation Shop Let's get started. Open up my template and delete the credits. HIghlight the 4 brackets layer. Go to selections > select all. Selections > float. Selections > defloat. Open up a paper of choice. Resize by 80%, smartsize. Copy and paste as a new layer onto your canvas. Go to selections > invert. Hit delete on your keyboard. Deselect. Give the layer a drop shadow of H and V 0, Opacity 60, Blur 10.00. Delete the 4 black brackets. Highlight the scalloped oval. Select, float and defloat. Open up a paper of choice. Resize by 77%, smartsize. Copy and paste as a new layer onto your canvas. Selections > invert. Hit delete. Deselect. Give the layer a drop shadow of H and V 0, Opacity 60, Blur 8.00. Delete the gray scalloped layer. Highlight the right rectangle layer. Select, float and defloat. Open up a paper of choice from the kit. Resize by 75%, smartsize. Copy and paste onto your canvas. Selections > invert. Hit delete. Deselect. Give the layer a drop shadow of H and V 0, Opacity 60, Blur 6.00. Open up a 2 flowersingles of choice from the kit. Resize by 20%, smartsize. Copy and paste them onto your canvas. Give both of them a drop shadow of H and V 0, Opacity 50, Blur 4.00. Position them to your liking on your right papered rectangle. Highlight your left rectangle layer and repeat all the steps that you did with your right. Highlight the right circle. Select, float and defloat. Open up a paper of choice. Resize by 77%, smartsize. Copy and paste as a new layer onto your canvas. Selections > invert. Hit delete. Do NOT deselect. Open up your first tube of choice. Resize if necessary, bicubic. Copy and paste as a new layer onto your canvas. Position to your liking within the selection. Hit delete. Deselect. Change the blend mode to Luminance (legacy) and give the tube a drop shadow of H and V 0, Opacity 50, Blur 5.00. Give the paper circle a drop shadow of H and V 0, Opcity 60, Blur 6.00. Delete the gray circle. Highlight your left circle layer. Repeat the same steps that you did with your right , but use a different tube. Highlight the right bracket. Select, float and defloat. Open up a paper of choice. Resize by 77%, smartsize. Copy and paste as a new layer onto your canvas. Selections > invert. Hit delete. Deselect. Delete the gray bracket. Highlight the left bracket. Select, float and defloat. Open up a contrasting paper of choice. Resize by 77%, smartsize. Copy and paste onto your canvas. Selections > invert. Hit delete. Deselect. Delete both gray brackets and give each paper bracket a drop shadow of H and V 0, Opacity 50, Blur 5.00, Open up a ribbon wrap of choice. Resize by 25%, smartsize. Copy and paste onto your canvas. Go to image > free rotate. Rotate left by 90.00, both boxes unchecked. Give the ribbon a drop shadow of H and V 0, Opacity 40, Blur 4.00. Position as in my tag above. Grab your freehand selection tool, type point to point, mode add. Carefully select around the areas of the ribbon that are hanging over. Hit delete. Deselect. Open up another ribbonwrap of choice. Resize by 25%, smartsize. Copy and paste as a new layer onto your canvas. Go to image > free rotate > right by 90.00, both boxes unchecked. Give the ribbon a drop shadow of H and V 0, Opacity 40, Blur 4.00. Position as in my tag above. With your freehand selection tool, select around the overhanging ends and delete. Deselect. Open up the flower border. Resize by 50%, smartsize. Copy and paste as a new layer onto your canvas. Give it a drop shadow of H and V 0, Opacity 50, Blur 3.00. Drag it beneath your crumpled ribbon. Position it like my tag above. Grab your freehand selection tool, and carefully select around the ends that are hanging over the scallop. Delete. Deselect. Duplicate the flower border and mirror. Position as in my tag above. Open up 2 hearts of choice. Resize them by 50%, smartsize. Copy and paste them onto your canvas. Give them a drop shadow of H and V 0, Opacity 50, Blur 4.00. Duplicate each heart and position all 4 to your liking. Add any other embellishments of your choosing. ( I added a couple of daisies and some knotted bows :-)) When you are done. Hide your white background and merge your visible layers. Highlight your white background. Open up a paper of choice from the kit (a darker colored paper will work best) Copy and paste onto your canvas. Apply vix's mask with the following settings: Source Luminance Fit to Canvas Hide all Mask Delete the mask from the layer palette, answer yes and merge the group. Resize the mask layer by 92%, smartsize. Crop and resize to your liking. Add your copyright info, watermark and text. Highlight your merged layer. Apply Xero Sparkles (change your foreground and background to 2 colors that you would like your sparkles to be) with the following settings: 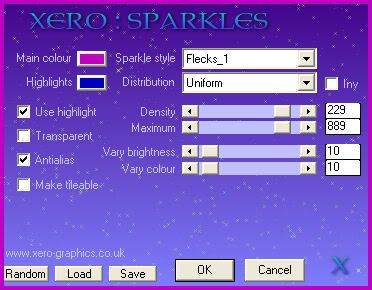 Copy merged. Open up Animation Shop. Paste as a new animation. Back to PSP. Go to Edit > Undo Sparkles. Apply Sparkles again but this time change the maximum to 891. Copy merged and paste after frame 1 in AS. Back to PSP. Go to Edit > Undo Sparkles. Apply sparkles again but this time change the max to 893. Copy merged and paste after frame 2 in AS. Optimize and save as gif. I hope you enjoyed this tut! If you have any questions, just give me a shout! |
Subscribe to:
Post Comments (Atom)
0 comments:
Post a Comment