Wednesday, May 4, 2011
 Delightful
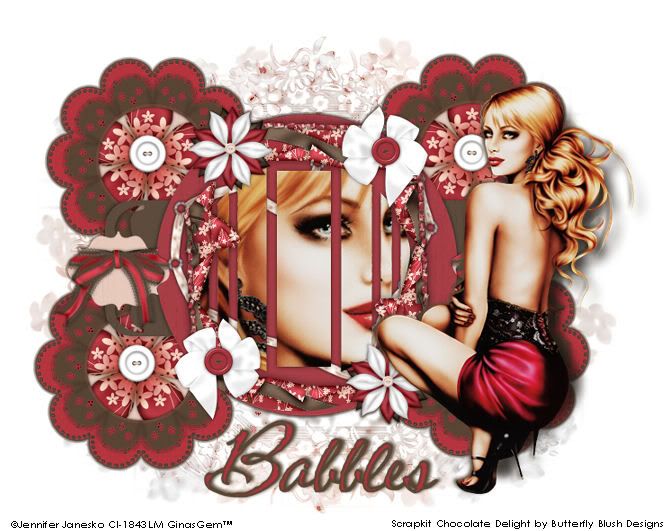
This tutorial was written by me on 28 October 2008. Any similarities to other tutorials is purely coincidental.
Supplies Needed:
Tube and close up/image of choice. I am using the elegant artwork of Jennifer Janesko. I got this tube when CILM was still open. You can find her at CDO now.
Scrapkit. I am using the lovely scrapkit Chocolate Delight by Butterfly Blush Designs. If you wish to use this scrapkit, you can purchase it here. Thank you Brooke!
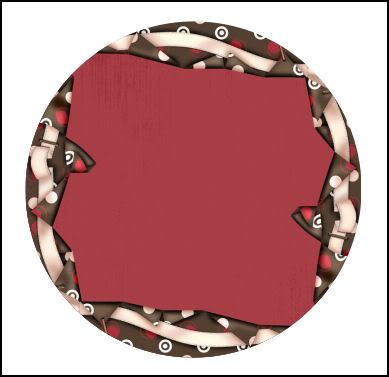
Template 16 by me which you can download here
Mask by Essex Girl. Check out her site for awesome masks!!
Font of choice. I uses CAC Shishoni Brush (pay font)
Plugins
Eyecandy 4000 Gradient Glow and HSB Noise
Let's get started! Open up my template. Delete the credits layer. Highlight your white background. Add a new raster layer. Floodfill with white. Apply Essex Girl's mask:
Source Luminace
Fit to Layer
Hide all Mask
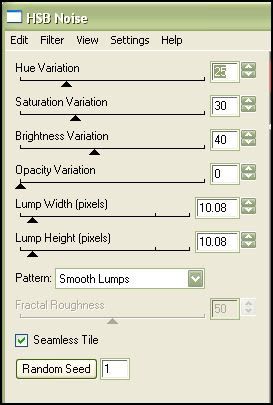
Invert Transparency checked. Load the mask. Delete the mask from your layer palette. Answer yes to the pop up box, and merge the group. Resize the mask by 90%, smartsize. Apply Eyecandy 4000 HSB Noise with the following settings:
Give your mask a drop shadow of H -1, V 1, Opacity 25, Blur 1.00
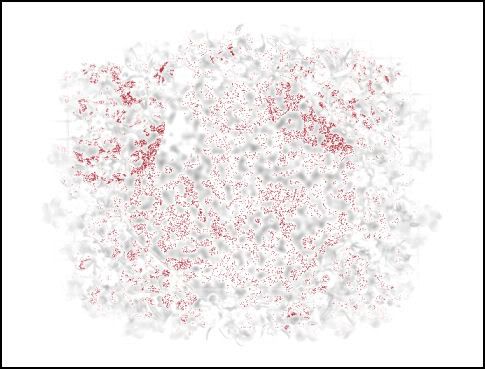
On your materials palette change your fore ground color to a color that matches your tube. ( I used color #b2343e) Grab your color replacer tool. (it's located underneath the paint/airbrush tool) Set the size to 80, Step 10, Density 5, Thickness 100, Rotation 0 and Tolerance 5. Click once with the brush in different places of the mask until you have something similiar to this:
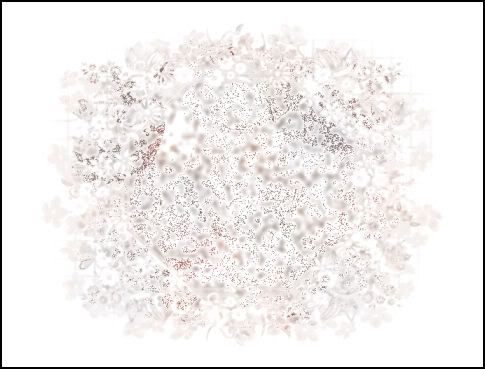
Now grab your Change to Target tool (it's in the same drop down menu as your Color Replacer tool) Set your Foreground to a light color from your tube. ( I used color #e7c9bc) Set the settings of your tool to Size 100, Hardness 50, Step 10, Denisity 100, Thickness 100 Rotation 0, Opacity 45. Brush across your mask, clicking more than once in certain places to saturate it more in the color. Continue until you have something similiar to this:
Highlight your rectangle layer. Go to selections > select all. Selections > float. Defloat. Open up a paper of choice from the kit and paste as a new layer onto your canvas. Go to selection > invert. Hit delete on your keyboard. Deselect (CTRL+D) Give the layer a drop shadow of H and V 0, Opacity 60, Blur 8.00. Delete the gray rectangle layer.
Highlight the circle layer. Select, float and defloat. Open up another paper of choice and paste as a new layer onto your canvas. Selections > invert. Hit delete on your keyboard. Do NOT deselect.
Open up a torn corner of choice from the scrapkit. Resize by 45%, smartsize. Copy and paste as a new layer onto your canvas. Position so that none of the straight edges are within the selection. Hit delete on your keyboard. Deselect. Give the torn corner a drop shadow of H and V 0, Opacity 50, Blur 5.00. Duplicate the torn corner. Go to image > mirror. Then image > flip. Position the duplicated corner so it lines up with your circle:
Give your papered circle a drop shadow of H and V 0, Opacity 60, Blur 8.00. Delete the gray circle layer.
Open up a Laced heart of choice. Resize by 70%, smartsize. Copy and paste onto your canvas. Go to image > free rotate. Rotate left by 15.00 degrees, both boxes unchecked. Position to your liking. Give it a drop shadow of H and V 0, Opacity 50, Blur 4.00. Drag it beneath your torn corners layers.
Highlight the circle slats layer. Select, float and defloat. Open up your image or close of choice. Coy and paste onto your canvas. Position to your liking within the slats. *if you are using a tube and parts of the gray slats show, copy and paste a paper underneath.* Selections > invert. Hit delete on your keyboard. Deselect. Give your image slats a dro shadow of H and V 0, Opacity 50, Blur 6.00. Delete the gray slats. Drag your torn corners layers above your slats layer.
Highlight the right bracket layer. Select, float and defloat. Open up a paper of choice. Copy and paste as a new layer onto your canvas. Selections > invert. Hit delete on your keyboard. Do NOT deselect.
Open up a bow ribbon of your choice. With your freehand selection tool, select around the one you would like to choose. Copy and paste as a new image. Close the original bow ribbon. Resize the copied bow ribbon by 30%, smartsize. Position the bow ribbon to your liking within the bracket. Grab your eraser tool, size 15, Opacity 90. Carefully erase the parts of the bow you don't want hanging out of the bracket. Deselect. Give the bow ribbon a drop shadow of H and V 0, Opacity 50, Blur 4.00. Give your paper bracket a drop shadow of H and V 0, Opacity 50, Blur 6.00. Delete the black left bracket layer.
Highlight your right bracket layer and repeat all of the steps that you did with the left bracket layer.
Open up a lacy frame of choice. Resize by 40%, smartsize. Copy and paste as a new layer onto your canvas. Grab your magic wand tool, tolerance set at 30, feather 0.00. Click inside the empty space of the frame. Go to selections > modify > expand by 5.00. Open up a contrasting paper of choice. Copy and paste as a new layer onto your canvas. Selections > invert. Hit delete on your keyboard. Deselect. Drag your paper layer beneath your frame. Give your frame a drop shadow of H and V 0, Opacity 50, Blur 5.00.
Open up a flower of choice. Resize by 60% smartsize. Highlight your frame paper layer. Copy and paste as a new layer onto your canvas. Give it a drop shadow of H and V 0, Opacity 50, Blur 4.00. Position the flower to your liking within the lace frame. Merge your lace frame, flower and frame paper together. Drag the merged layer between your circle layer and rectangle layer. Duplicate the layer 3x, so you have a total of 4 layers. Position the four frames like my tag above.
Add any embellishments of your choosing.
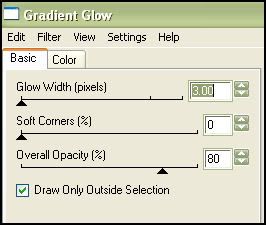
Hide your white background and mask layer. Merge your visible layers together. Apply Eyecandy 4000 Gradient Glow with a color of choice (I used color #543f2f) with the following settings:
Open up your tube. Resize as necessary, bicubic. Copy and paste as a new layer onto your canvas. Position to your liking. Give your tube the same gradient glow but change the glow width to 5.00.
Crop and resize to your liking. Add your copyright, watermark and text. Save as PNG or JPG
I hope you enjoyed this tutorial. If you have any questions, just give me a shout!
Subscribe to:
Post Comments (Atom)
0 comments:
Post a Comment