Monday, May 2, 2011
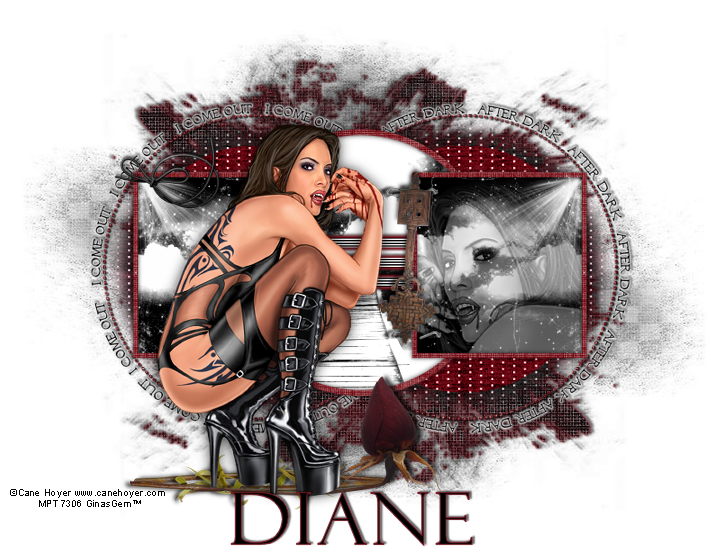
 After Dark
This tutorial was written by me on 17 June 2009. Any similarities to other tutorials is purely coincidental.
Supplies Needed:
Tube and close up of choice. I am using the fantastic artwork of Cane Hoyer. If you wish to use his artwork, you must purchase a license with MPT.
Scrapkit. I am using the awesome kit After Dark by Candy's Treats. This kit has a broad color scheme that will work with most tubes. . . I chose to use the red. :-) If you wish to purchase this awesome kit, you can here. Thank you, Diane!!
Template 171 made by me which you find here.
Mask 349 by Vix. Check out her site for great tuts and resources!!
Font of choice. I used Felix Tilting. (pay font)
Plugins:
Xero Filters - Bad Dream XL and Grayscaler
Eyecandy 4000 - Gradient Glow
Supplies HERE
*~*~*~*~*~*~*~*~*~*~*~*~*~*~*~*~*~*~*~*~*~*~*~*~*~*~*~*~*~*~*~*~*~*~*~*~*~*~*~*~*
Ok! Let's get started! Open up my template. Duplicate by holding down shift + d. Close the original. Delete the credit info layer.
Highlight the vertical stripes layer. Go to selections > select all. Selections > float. Selections > defloat. Open up a paper from the kit. (I used paper 15) Resize by 70%, smartsize. Copy and paste as a new layer onto your canvas. Go to selections > invert. Hit delete on your keyboard. Deselect (CTRL+D). Give the layer a drop shadow of H 2, V -2, Opacity 75, Blur 4.00. Delete the gray vertical stripes layer.
Highlight the circle 1 layer. Grab your magic wand tool, tolerance set at 100, feather set at 30.00. Open up a paper from the kit. (I used paper 13) Copy and paste as a new layer onto your canvs. Go to selections > invert. Hit delete on your keyboard 10 x. Deselect. Highlight the circle 1 layer again. Resize it by 85%, smartsize. Move the circle into the center of the left dotted circle. Select, float and defloat. Choose a color that matches the paper you just used. Floodfill the circle 1 layer with this color. Highlgiht the paper circle and change the blend mode to Luminance (Legacy). Give it a drop shadow of H and V 0, Opacity 55, Blur 7.00.
Highlight the circle 2 layer and repeat the same steps you did for the circle 1 layer.
Highlight the dotted circles layer. Select, float and defloat. Open up a paper from the kit. (I used paper 15) Resize by 80%, smartsize. Copy and paste as a new layer onto your canvas. Selections > invert. Hit delete and deselect. Give the layer a drop shadow of H and V 1, opaciyt 60, Blur 2.00. Delete the gray dotted circles layer.
Highlight the AFTER DARK layer. Apply Gradient Glow, color white, with the following settings:
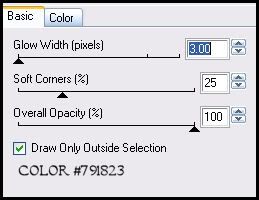
Give the layer a drop shadow of H and V -1, Opacity 65, Blur 3.00. Highlight the I COME OUT layer and repeat the gradient glow. Give the layer a drop shadow of H 1, V -1, Opacity 65, Blur 3.00.
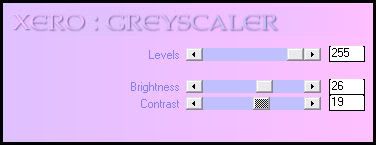
Highlight the circle fill layer. Select, float and defloat. Open up a paper from the kit. (I used paper After Dark Bridge - Textured) Resize by 60%, smartsize. Copy and paste as a new layer onto your canvas. Position the paper to your liking within the selection. Hit delete. Deselect. Apply Xero Grayscaler witht he following settings:
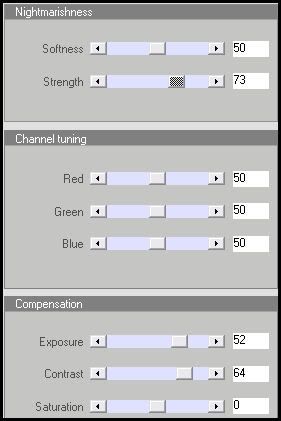
Now apply Xero - Bad Dream XL with the following settings:
Delete the black circle fill layer.
Highlight the circle frame layer. Select, float and defloat. Open up a paper fromt he kit (I used paper 15). Copy and paste as a new layer onto your canvas. Selections > invert. Hit delete and deselect. Give the layer a drop shadow of H and V 0, Opacity 80, Blur 8.00. Delete the white circle frame layer.
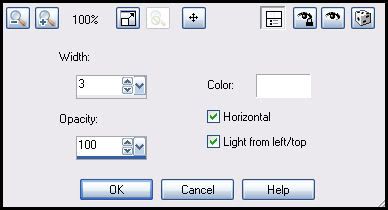
Highlight the horizontal stripes layer. Select, float and defloat. Add a new raster layer. Floodfill the new layer with black. Deselect. Go to effects > texture effects > blinds. Apply with the following settings:
Now apply Graident Glow, with a color of choice, same settings as before. Repeat the gradient glow. Give the layer a drop shadow of H and V 0, Oapcity 70, Blur 6.00. Delete the gray horizontal stripes layer.
Highlight the right frame fill layer. Select, float and defloat. Open up a paper from the kit. (I used After Dark Clouds paper 3 - textured) Resize by 45%, smartsize. Copy and paste as a new layer onto your canvas. Position the paper toy our liking within the selection. Selections > invert. Hit delete on your keyboard. Don't deselect.
Open up your close up. Resize as necessary, bicubic. Copy and paste onto your canvas. Position to yourl iking witin the selection. Hit delete. Lower the opacity of the close up or tube to 50 and change the blend mode to Luminance (Legacy).
Highlight the textured cloused paper and apply grayscaler, same settings as before. Now apply Bad Dream XL, same settings as before. Duplicate the clouds paper. Go to image > mirror. Delete the right frame fill layer and the left frame fill layer.
Open up light sparkle 5 from the kit. Resize by 25%, smartsize. Copy and paste as a new layer onto your canvas. Duplicate. Go to image > mirror. Position the light sparkles within the frames.
Highlight the right frame layer. Select, float and defloat. Open up a paper from the kit. Resize by 50%, smartsize. Copy and paste as a new layer onto your canvas. Position to your liking within the selection. Selections > invert. Hit delete and deselect. Give the layer a drop shadow of H and V 0, Opacity 80, Blur 6.00. Duplicate. Go to image > mirror. Delete the right frame layer and the left frame layer.
Open up String 01 from the kit. Resize by 25%, smartsize. Copy and paste as a new layer onto your canvas. Go to image > mirror. Give it a drop shadow of H andf V 0, Opacity 50, Blur 5.00. Position to your liking on your left frame.
Open up the key from the kit. Resize by 50%,s martsize. Copy and paste as a new layer onto your canvas. Give it a drop shadow of H and V 0, Opacity 65, Blur 5.00. Position to your liking.
Open up flower 2 from the kit. Resize by 50%, smartsize. Copy and paste as a new layer onto your canvas. Give it a drop shadow of H 3, V 2, Opacity 60, Blur 5.00. Position to your liking or see my tag for reference.
Open up stem 1 from the kit. Resize by 50%, smartsize. Copy and paste as a new layer onto your canvas. Give it a drop shadow of H -3, V -2, Opacity 60, Blur 5.00. Duplicate. Go to image > mirror. Then, image > flip. Position them underneath your flower.
Open up your tube. Resize as necessary, bicubic. Copy and paste as anew layer onto your canvas. Give it a drop shadow of H and V 0, Opaciyt 75, Blur 20.00. Arrange to right of your tag.
Add any other embellishments of your choosing.
Highlight your white background layer. Open up a paper from the kit. Copy and paste as a new layer onto your canvas. Apply Vix Mask 349 with the following settings:
Source Luminance
Fit to Canvas
Hide all Mask
Delete the mask, answer yes and merged the group. Apply gradient glow, with a color of choice, same settings as before. Give the mask a drop shadow of H -2, V 0, oapcity 55, Blur 2.00. Duplicate the mask. Go to image > mirror. Then, image > flip. Center the mask layers behind your tag.
Crop and resize to your liking.
Add your copyright info, watermark and your text.
Save as JPG or PNG.
I hope you enjoyed this tutorial! If you have any questions, just give me a shout.
Subscribe to:
Post Comments (Atom)
0 comments:
Post a Comment