Wednesday, May 4, 2011
 Addictive Pleasure

This tutorial was written by me on 4 October 2008. Any similarities to other tutorials is purely coincidental.
Supplies Needed:
Tube of choice. I am using the gorgeous artwork of Jennifer Janesko. I got this tube when CILM was still open. You can find her at CDO now.
Scrapkit. I'm using the beautiful scrapkit Addictive Pleasures by Scraps by Jessica. If you wish to purchase this scrapkit you can here
Animation made by me using design tiles from here
Mask template made by me
Font of choice. I am using Champignon which you can download here
Animation Shop
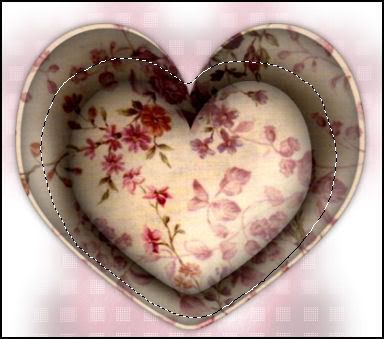
Ok! Let's begin. Open up the Addictive Pleasure Mask Canvas provided. Colorize it the mask layer to match your tube. Open up a box of choice from the scrapkit. Resize by 70%, smartsize. Paste as a new layer onto your canvas. Give it a drop shadow of H and V 0, Opacity 65, Blur 10.00.
Grab your freehand selection tool Selection type: point to point, feather set at 25.00. Select around the inside of the box like this:
Open up your tube. Resize if necessary, bicubic. Copy and paste onto your canvas. Position the tube within the selection to your liking. Go to Selections > Invert. Hit delete on your keyboard 6-8 times. Deselect (CTRL+D) Give your tube a drop shadow of H and V 0, Opacity 65, blur 8.00. Change the blend mode of the tube to Luminance (Leagacy)
Open up a ribbon of choice. Resize by 80%, smartsize. Paste onto your canvas and position to your liking. Grab your freehand selection tool, selection type point to point, feather 0.00. Carefully select around the parts of the ribbon that you wish to delete. Hit delete on your keyboard. Give the ribbon a drop shadow of H and V 0, Opactiy 45, blur 3.00.
Open up Frame3 from the scrapkit. Resize by 35%, smartsize. Paste as a new layer onto your canvas. Go to Effects > Geometric > Persepctive-Horizontal. Apply with the following settings:

Duplicate the frame and mirror it. Position them side by side, at the point of the heart box. Merge the two frame layers together. Grab your magic wand tool, tolerance 30, feather 0.00. Click inside the empty spaces of the frames. Go to Selections > Modify > Expand by 4.00. Open up a paper of choice from the kit. Paste as a new layer onto your canvas. Go to Selections > Invert. Hit delete on your keyboard. Do NOT deselect!
Copy and paste your tube onto your canvas. Position to your liking, and hit delete on the keyboard. Deselect (CTRL+D) Highlight your frames and give them a drop shadow of H and V 0, Opacity 50, Blur 5.00.
Open up a rose of choice. Resize by 60%, smartsize. Paste onto your canvas. Go to Image> Free Rotate. Rotate Left by 90.00, both boxes unchecked. Give the rose a drop shadow of H and V 0, Opacity 50, Blur 5.00. Position the rose at the bottom of the frames.
Open up the perfume bottle from the kit. Resize by 50%, smartsize. Paste onto your canvas and give it the same drop shadow you gave the rose. Position it in the middle of the frames.
Open up a bow of choice. Resize by 30%, smartsize. Paste onto your canvas and give it a drop shadow of H and V 0, Opacity 50, Blur 3.00. Position the bow to your liking.
Open up a couple of flowers from the scrapkit. Resize by about 35%, smartsize. Copy and paste onto your canvas. Position to your liking. Give them the same drop shadow you gave your bow.
Highlight your mask layer. Open up the flower spray from the scrapkit. Resize by 60%, smartsize. Position in the upper left behind the heart box. Give the spray a drop shadow of H and V 0, Opacity 60, Blur 5.00. Duplicate the flower spray. Go to Image > Mirror. Position the duplicated spray in the upper right of the heart.
Add any other embellishments of your choosing. Add your copyright, watermark and text. Crop ( DO NOT RESIZE ) to your liking. Hide your white background, and your mask layer. Merge all visible layers. Hide your merged layer, and unhide your white background, and mask layer. Merge the mask layer and white background together. Copy.
Open up Animation Shop. Paste the background and mask as a new animation. Duplicate the frame until you have 8 frames. Select all frames (CTRL+A) Open up the tear animation. Select all frames (CTRL+A) Copy. Go to Edit > Paste into Selected frame.
Back to Paint Shop Pro. Copy the heart box, tube etc, merged layer. Paste as a new animation in AS. Duplicate the frame until you have a total of 8 frames. Select all frames (CTRL+A). Copy. Open up the mask animation. Select all frames (CTRL+A). Go to Edit > Paste into selected frame. Now you can resize in Animation Shop if you wish.
Optimize and save as gif.
I hope you enjoyed this tutorial. If you have any questions, give me a shout or send me an email. :-)
Subscribe to:
Post Comments (Atom)
0 comments:
Post a Comment