Wednesday, May 4, 2011
 Snow Buddies
This tutorial was written by me on 29 November 2008. Any simalirites to other tutorials is purely coincidental.
Supplies Needed:
2 Tubes of choice. I am using the adorable artwork of Suzanne Woolcott. If you wish to use her artwork, you must purchase a license here
Scrapkit Snow Buddies by Missy of Scraps with Attitude. You can purchase this oh too cute scrap here Thank you, Missy!!
Template 56 made by me which you can get here
Faux Snowflakes made by me, which you can download here
Font of choice. I used Christmas Gift Script Bold
Plugins:
Xenofex 2 - Constellation for animation
Animation Shop (opt)
No other supplies needed
**********************************************************************************************************
Let's get started! Open up my template. Duplicate by holding down shift + d. Close the original. Delete the credit info layer.
Highlight the snowflake wreathe layer. Go to selections > select all. Selections > float. Selections > defloat. Open up a paper of choice from the kit. Resize by 68%, smartsize. Copy and paste as a new layer onto your canvas. Go to selections > invert. Hit delete on your keyboard. Deselect (CTRL+D) Give the layer a drop shadow of H and V 0, Opacity 50, Blur 10.00. Delete the gray snowflake wreathe.
Highlight the big rectangle layer. Select, float and defloat. Open up a paper of choice from the kit. Resize by 68%, smartsize. Copy and paste onto your canvas. Selections > invert. Hit delete and deselect. Delete the black rectangle.
Open up the dangling stars and beads. Resize by 75%, smartsize. Copy and paste onto your canvas. Give the beads a drop shadow of H 1, V 0, Opacity 45, Blur 3.00. Position to your liking within the big rectangle.
Highlight the paper big rectangle layer. Select, float and defloat. Go to selections > modify > expand by 1.00. Selections > invert.
Highlight the stars and beads layer. Grab your eraser tool, size 25, Opacity 100. Carefully erase the parts of the beads you don't want hanging out of your rectangle. Deselect.
Highlight your paper big rectangle layer and give it a drop shadow of H and V 0, Opacity 60, Blur 10.00.
Highlight the long rectangle layer. Select, float and defloat. Open up a paper of choice from the kit. Resize by 45%, smartsize. Copy and paste onto your canvas. Position the paper within your selection. Selections > invert. Hit delete. Deselect. Give the layer a drop shadow of H and V 0, Opacity 60, Blur 8.00. Delete the gray long rectangle.
Highlight the 2 rectangles layer. Select, float and defloat. Open up a paper from the kit. Don't resize. Copy and paste as a new layer onto your canvas. Selections > invert. Hit delete and deselect. Give the layer a drop shadow of H and V 0, Opacity 60, Blur 6.00. Delete the gray 2 rectangles.
Highlight the large circle layer. Select, float and defloat. Open up a paper from the kit. Resize by 68%, smartsize. Copy and paste onto your canvas. Selections >invert. Hit delete on your keyboard. Do not deselect.
Open up the stars and beads again. Resize by 45%, smartsize. Copy and paste as a new layer onto your canvas. Position to your liking within the selection. Hit delete and deselect. Give the beads a drop shadow of H 1, V 0, Opacity 25, Blur 3.00. Duplicate the beads. Go to image > flip.
Highlight the paper circle layer. Select, float and defloat. Go to selections > modify > expand by 1.00. Open up your main tube. Resize as necessary bicubic. Give it a drop shadow of H and V 0, Opacity 50, Blur 10.00. Copy and paste onto your canvas. Position to your liking within the selection. Go to selections > invert. Hit delete on your keyboard, and deselect.
Highlight the paper circle layer. Give it a drop shadow of H and V 0, Opacity 50, Blur 10.00. Delete the gray circle layer.
Highlight the circle 1 layer. Select, float and defloat. Open up a paper of choice from the kit. Resize by 45%, smartsize. Copy and paste onto your canvas. Position within the selection. Selections > invert. Hit delete and deselect.
Open up your second tube of choice. Resize as necessary, bicubic. Give it a drop shadow of H and V 0, Opacity 50, Blur 8.00. Copy and paste onto your canvas. Position to your liking within the selection. Grab your eraser tool, size 20, opacity 100. Carefully erase the parts of the tube, you don't want hanging out of the circle. Deselect.
Highlight your circle 2 layer. Select, float and defloat. Open up the paper you used for circle 1. Resize by 45%, smartsize. Copy and paste onto your canvas. Selections > invert. Hit delete and deselect.
Highlight the tube in your small circle. Duplicate the tube and mirror. Position in circle 2.
Highlight your paper circle 1. Give it a drop shadow of H and V 0, Opacity 50, Blur 8.00. Highlight your paper circle 2 layer and give it the same drop shadow. Delete both small gray circles.
Highlight your big rectangle layer. Open up a word ribbon of choice. Resize by 45%, smartsize. Copy and paste onto your canvas. Give it a drop shadow of H and V 0, Opacity 50, Blur 5.00. Duplicate the word art ribbon. Position them as in my tag above.
Open up the tree from the kit. Resize by 48%, smartsize. Copy and paste onto your canvas. Give it a drop shadow of H and V 0, Opacity 50, Blur 5.00. Duplicate the tree. Go to image > mirror. Position the trees as in my tag above.
Open up the hearts on a rope. Resize both by 10%, smartsize. With your freehand selection tool (type point to point) select around the one you wuld like to use. Copy and paste them onto your canvas. Give them both a dro shadow of H and V 0, Opacity 50, Blur 3.00. Duplicate and mirror each of the hearts (so you have a total of 4) Position them to your liking on your trees.
Open up 2 of the faux snowflakes. Resize each one by 30%, smartsize. Copy and paste them onto your canvas. Duplicate each one 1x, for a total of 4 snowflakes. Position them to your liking on your trees.
Open up a button of choice. Resize by 10%, smartsize. Copy and paste onto your canvas. Give it a drop shadow of H and V 0, Opacity 50, Blur 3.00. Duplicate the button 3x for a total of 4 buttons. Position them at the 4 corners of the big rectangle.
Open up a double bow of choice. Resize by 10%, smartsize. Copy and paste onto your canvas. Give it a drop shadow of H and V 0, Opacity 50, Blur 5.00. Duplicate the bow and mirror it. Position as in my tag above.
Open up 2 snowmen that are facing different directions. Resize them by 20%, smartsize. Copy and paste them onto your canvas. Give them both a drop shadow of H and V 0, Opacity 50, Blur 7.00. Position at the bottom of your tag. (see mine for reference)
Open up two kids of choice. Resize by 15%, smartsize. Copy and paste them onto your canvas. Give them both a drop shadow of H and V 0, Opacity 50, Blur 5.00. Position one next to each snowman.
Open up the wagon of choice. Resize by 15%, smartsize. Copy and paste onto your canvas. Give it a drop shadow of H and V 0, Opacity 50, Blur 4.00. Position it in front of the kids.
Add any other embellishments of your choosing.
Hide your white background, and merge your visible layers.
Duplicate your merged layer. On the bottom layer, go to effects > texture effects > straw wall. Apply with the following settings:
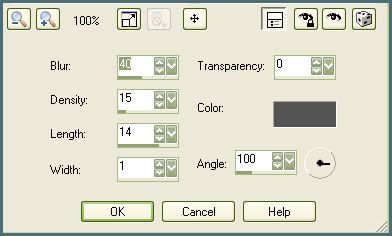
Apply straw wall again with the following settings.
Still on the straw layer, go to adjust > brightness/contrast > brightness contrast and apply with the following settings:

Crop and resize to your liking.
Add your copyright info, watermark and your text.
If you are not animating, save as JPG or PNG.
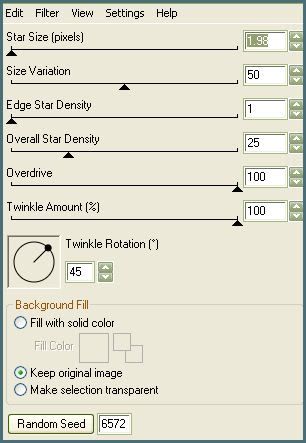
If you are animating, highlight the straw layer. Apply Xenofex Constellation with the following settings:
Copy merged. Open up Animation Shop. Paste as a new animation in AS.
Back to Paint Shop Pro. Go to edit > undo constellation. Apply constellation again to the straw layer but this time hit the random seed button. Copy merged and paste after your current frame in AS.
Repeat the above steps one more time for a total of 3 frames
Optimize and save as gif.
I hope you enjoyed this tutorial! If you have any questions, just give me a shout!
Subscribe to:
Post Comments (Atom)
0 comments:
Post a Comment