Wednesday, May 4, 2011
 Gossamer Beauty
This tutorial was written by me on 18 November 2008. Any similarities to other tutorials is purely coincidental.
Supplies Needed:
Tube of choice. I am using the beautiful artwork of Jennifer Janesko. I got this tube when CILM was still open. You can find her at CDO now.
Scrapkit. I am using the elegant scrap Rachel by Jessica. If you wish to purchase this lovely scrap you can here Thank you, Jessica!
UF Mask 16 by Sunf. You can download this mask, plus many other great ones here
Font of choice. I used Engravers (pay font) and porcelain which you can download here
Plugins:
Xenofex 2 Crumple and Constellation
Xero Porcelain
No other supplies needed
Let's get started! Open up a new transparent image 700 x 700. Floodfill with white. Open up the hanging frame from the kit. Resize by 70%, smartsize. Copy and paste as a new layer onto your canvas.
Open up the staple from the kit. Resze by 50%, smartsize. Copy and paste onto your canvas. Give the staple a dro shadow of H and V 0, Opacity 60, Blur 5.00. Duplicate the staple. Position the staples over the top chain links of the frame. Duplicate each staple. Drag one of the staples from each side below your frame. Grab your eraser tool, size set at 10.00, opacity 100. Highlight one of your top staples. Carefull erase a part of the staple so that it looks as if it is looped through the chain link. (see my tag for reference. Repeat on the other side.
Grab your magic wand tool, tolerance set at 100, feather set at 0.00. Click inside both empty spaces of the frame. Go to selections > modify > expand by 2. Open up a paper of choice from the kit. Resize by 91%, smartsize. Copy and paste the paper onto your canvas. Position to your liking within the selection. Go to selections > invert. Hit delete. Do NOT deselect.
Open up your tube. Resize if necessary, bicubic. Copy and paste onto your canvas. Position to your liking within the selection. Hit delete. Deselect. Give your tube a drop shadow of H and V 0, Opacity 60, Blur 4.00. Drag your paper layer and your tube layer below your frame (making sure your tube layer is above your paper layer)
Highlight your frame and give it a drop shadow of H and V 0, Opacity 60, Blur 7.00.
Open up RFlowers2 from the kit. Resize by 20%, smartsize. Copy and paste onto your canvas. Give them a drop shadow of H and V 0, Opacity 50, Blur 4.00. Duplicate the flowers. Go to image > flip. Position the flowers to your liking on the frame.
Open up 3 forget me nots of choice. Resize one by 25%, smartsize. Resize another by 20%, smartsize. And the last one by 15%, smartsize. Copy and paste them onto your canvas. Give them all the same drop shadow you gave your flowers. Position them to your liking.
Hide your white background and merge your visible layers. Hide your merged layer.
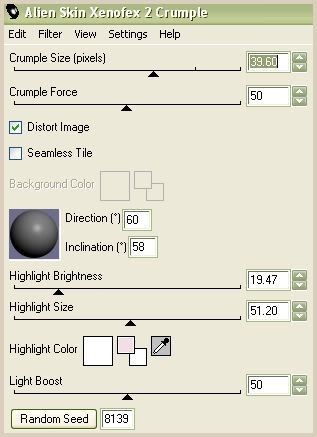
Highlight your white background. Open up paper bit 2 from the kit. Resize by 40%, smartsize. Copy and paste onto your canvas. Apply Xenofex Crumple iwth the following settings:
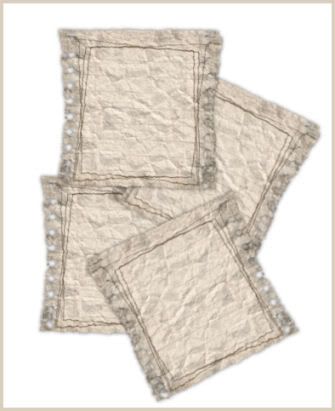
Give the paper a drop shadow of H and V 0, Opacity 60, Blur 8.00. Duplicate the paper bit. Go to image > free rotate. Rotate right by 25.00, both boxes unchecked. Duplicate the rotated paper bit. Go to image > mirror. Duplicate the original paper bit. Position them like this:
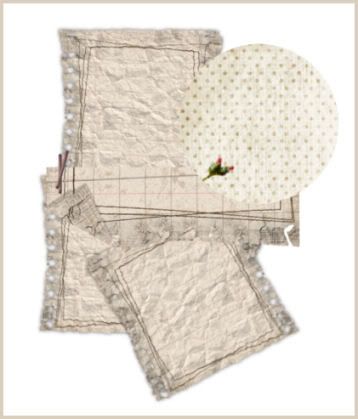
Open up paper bit 1 from the kit. Resize by 60%, smartsize. Copy and paste onto your canvas. Give it a drop shadow of H and V 0, Opacity 60, Blur 5.00. Go to image > free rotate. Rotate left by 90.00, both boxes unchecked. Position in the middle of your 4 paper bits.
Merge your paper bit layers together. Open up a paper of choice from the kit. Make the paper your background on your materials palette (angle 0, scale 100) Make your foreground null.
Grab your preshape tool, circle. Draw out a small circle:
Convert the circle to a raster layer. Making sure your circel layer is highlighted, go to selections > select all. Selections > float. Selections > defloat. Open up a wrap ribbon of choice. Resize by about 55 -
60%, smartsize. (depending on how large you made your circle.) Copy and paste the ribbon onto your canvas. Position the ribbon in the middle of the circle. Grab your eraser tool, same settings as before and carefull erase the part of the end that is hanging over the circle. Deselect. Give the ribbon a drop shadow of H and V 0, Opacity 50, Blur 6.00. Highlight your circle and give it a drop shadow of H and V 0, Opacity 60, Blur 8.00. Merge your wrap ribbon and circle together. Duplicate the circle ribbon layer and go to image > mirror. Position the circles to your liking.
Open up a fan of choice from the kit. Resize by 25%, smartsize. Copy and paste onto your canvas. Give it a drop shadow of H and V 0, Opacity 50, Blur 5.00. Duplicate and mirror the fan. Position to your liking.
Unhide all layers and position them to your liking.
Highlight your white background. Open up flowers 4 from the kit. Resize by 60%, smartsize. Copy and paste onto your canvas. Go to image > free rotate. Rotate left by 90.00, both boxes unchecked. Apply Mura Meister Copies with the following settings:
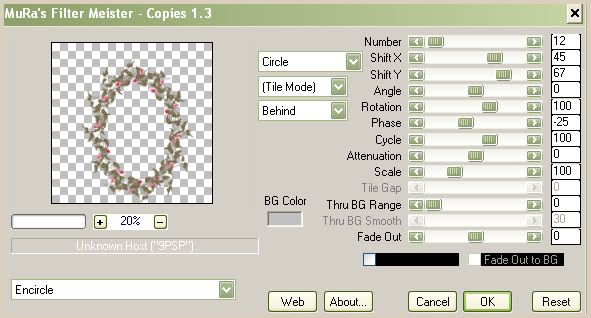
Resize the encircle flowers by 95%, smartsize. Give the layer a drop shadow of H 1, V -1, Opacity 60, Blur 2.00.
Hide your white background and merge your visible layers. On your merged layer, resize by 85%, bicubic.
Open up the word art from the kit. Resize by 70%, smartsize. Copy and paste onto your canvas. Give it a drop shadow of H 1, V 0, Opacity 60, Blur 2.00. Position to your liking.
Highlight your white background. Open up a paper of choice from the kit. Don't resize it! Copy and paste onto your canvas. Apply UF Mask 16:
Source Luminance
Fit to Layer
Hide all Mask
Invert Transparencey checked.
Delete the mask from your layer palette. Answer yes to the pop up box and merge the group. Give the mask layer a drop shadow of H 1, V 0, Opacity 60, Blur 3.00. Positon to your liking.
Hide your white background and merge your visible layers. On your merged layer, apply xero porcelain with the following settings:

Go to adjust > sharpness > unsharp mask. Apply with the following settings:
Radius 5
Strength 15
Clipping 1
Crop and resize to your liking.
Add your copyright, watermark and your text. If you are not animating, save as JPG or PNG.
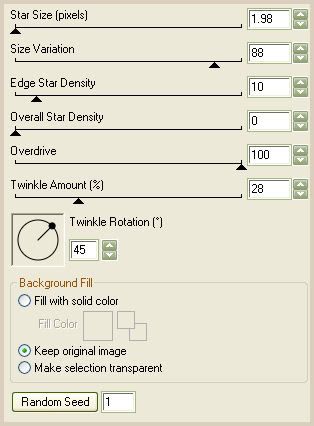
If you are animating, highlight the tag layer. Apply constellation with the following settings:
Copy merged. Open up Animation Shop. Paste as a new animation in AS.
Back to paint shop pro. Go to edit > undo constellation. Apply constellation again, but this time hit the random seed button. Copy merged and paste after frame 1 in AS.
Repeat the above step 2 more times for a total of 4 frames. Select all frames (CTRL+A) Change the frame properties to 15.
Optimize and save as gif.
I hope you enjoyed this tutorial. If you have any questions, just give me a shout. :-)
Subscribe to:
Post Comments (Atom)
0 comments:
Post a Comment